Chop Water, Carry Wood
Selected reflections on a life unfolding.
In pursuit of our goals we humbly chop our wood, and carry our water. But sometimes it's a little more fun to chop that water.
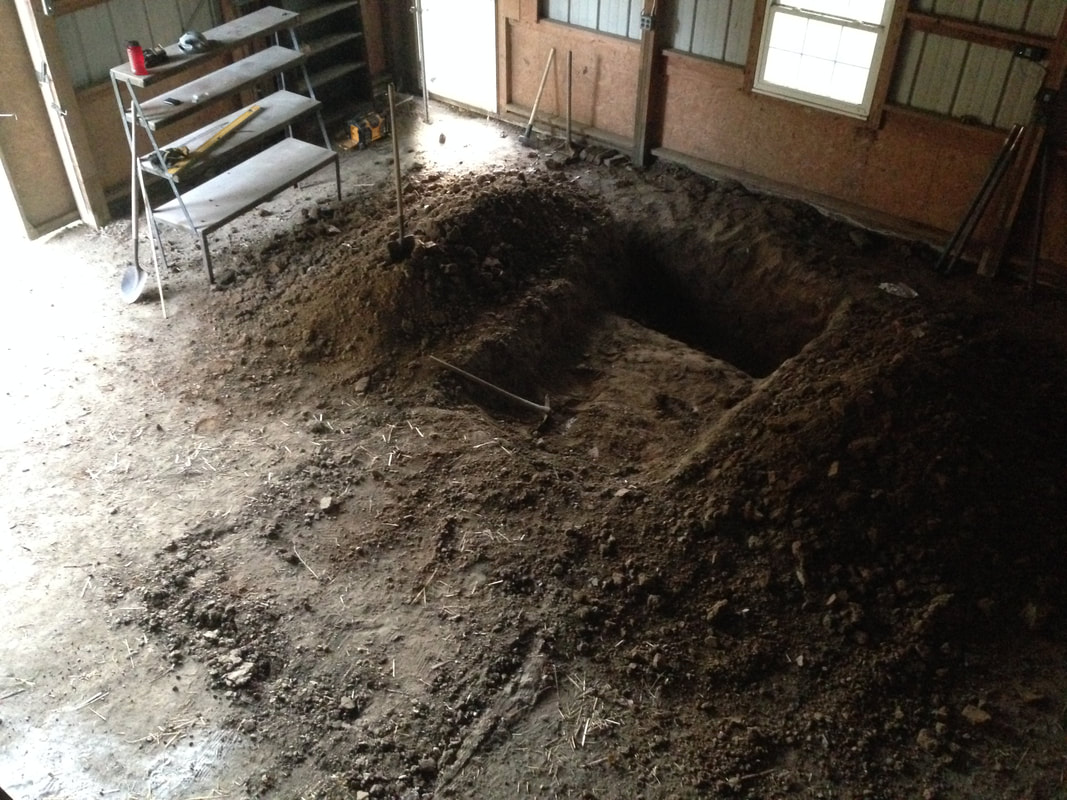
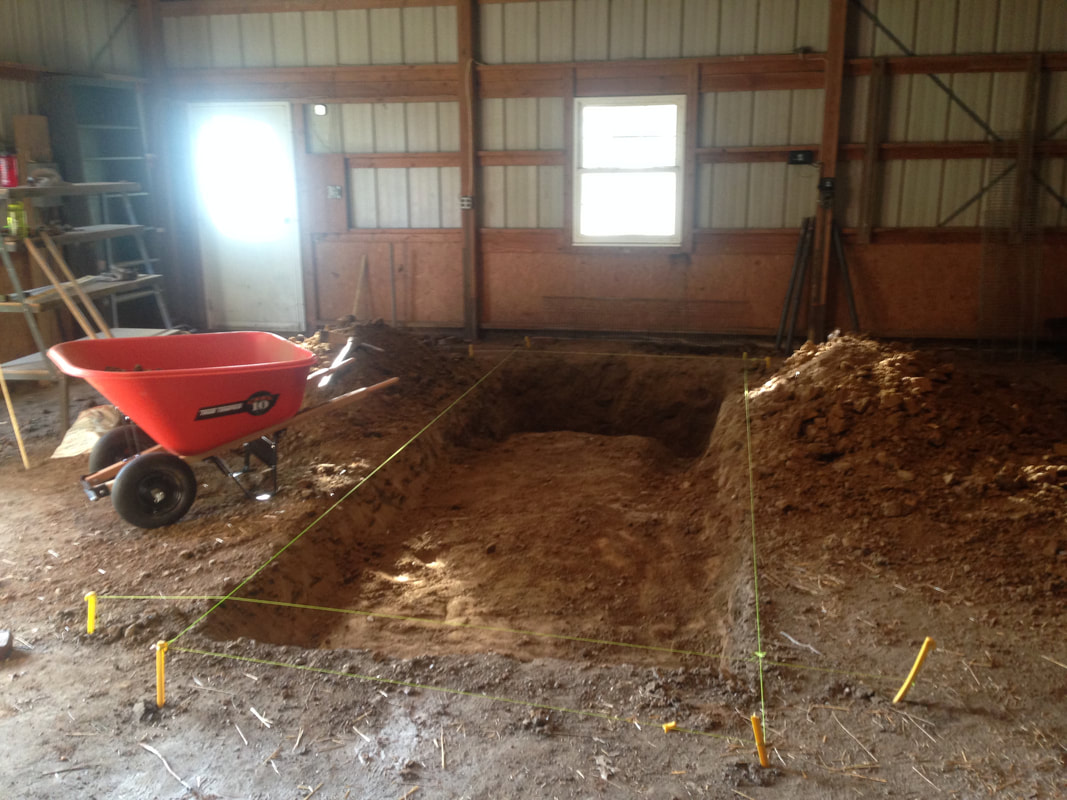
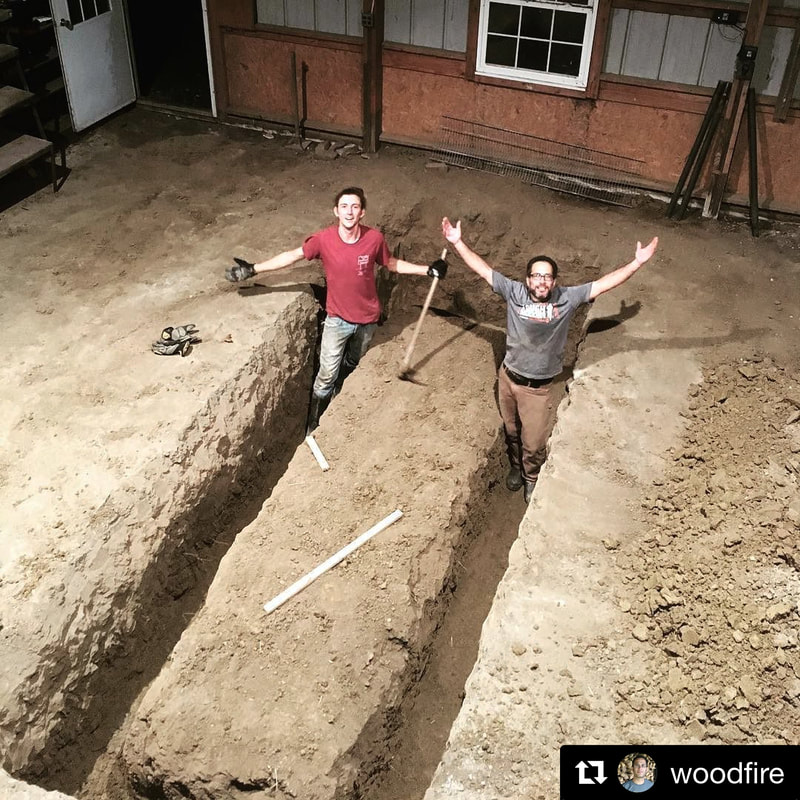
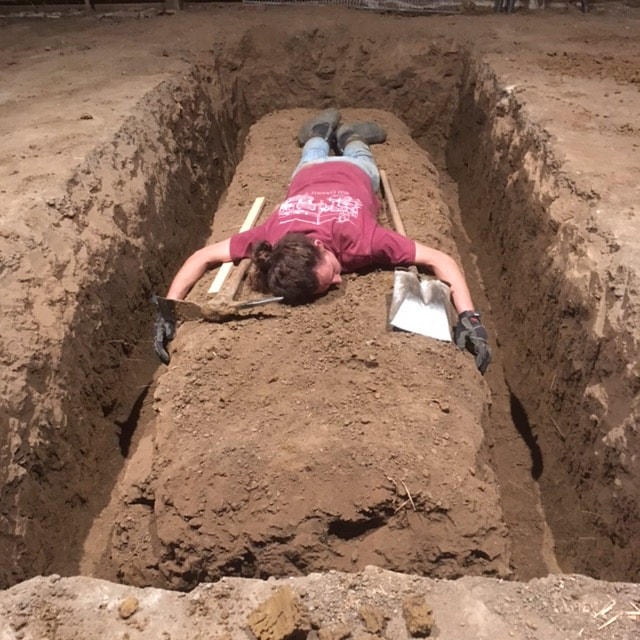
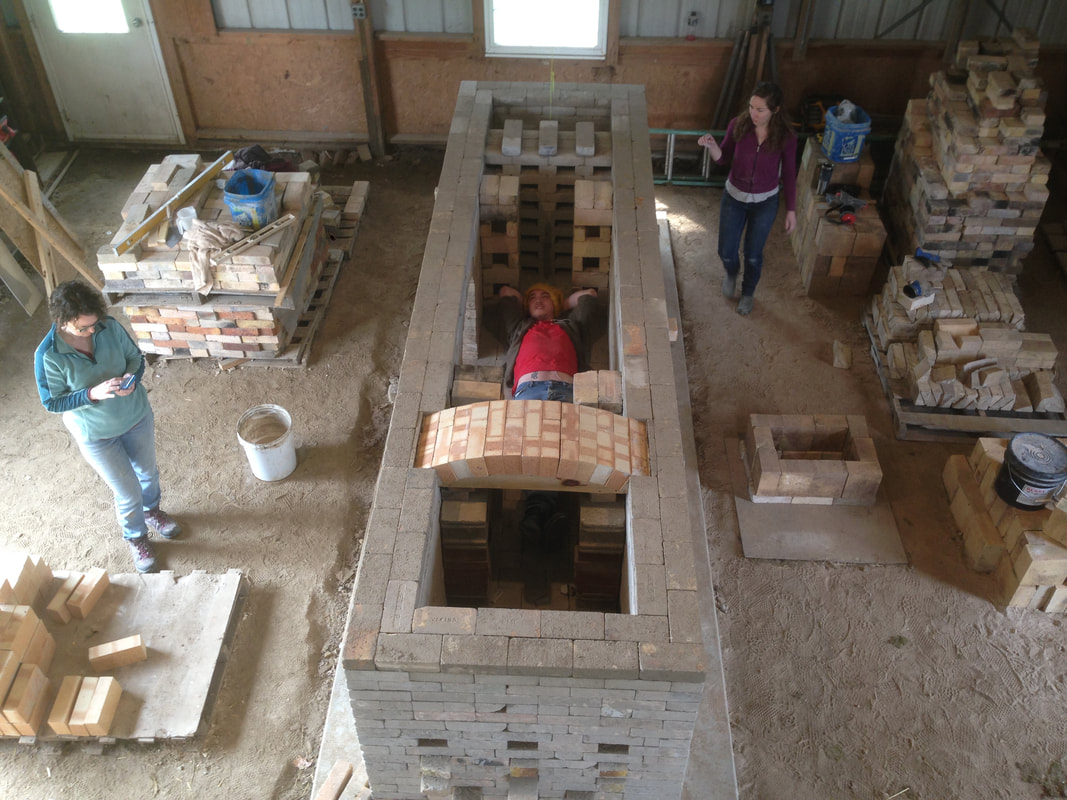
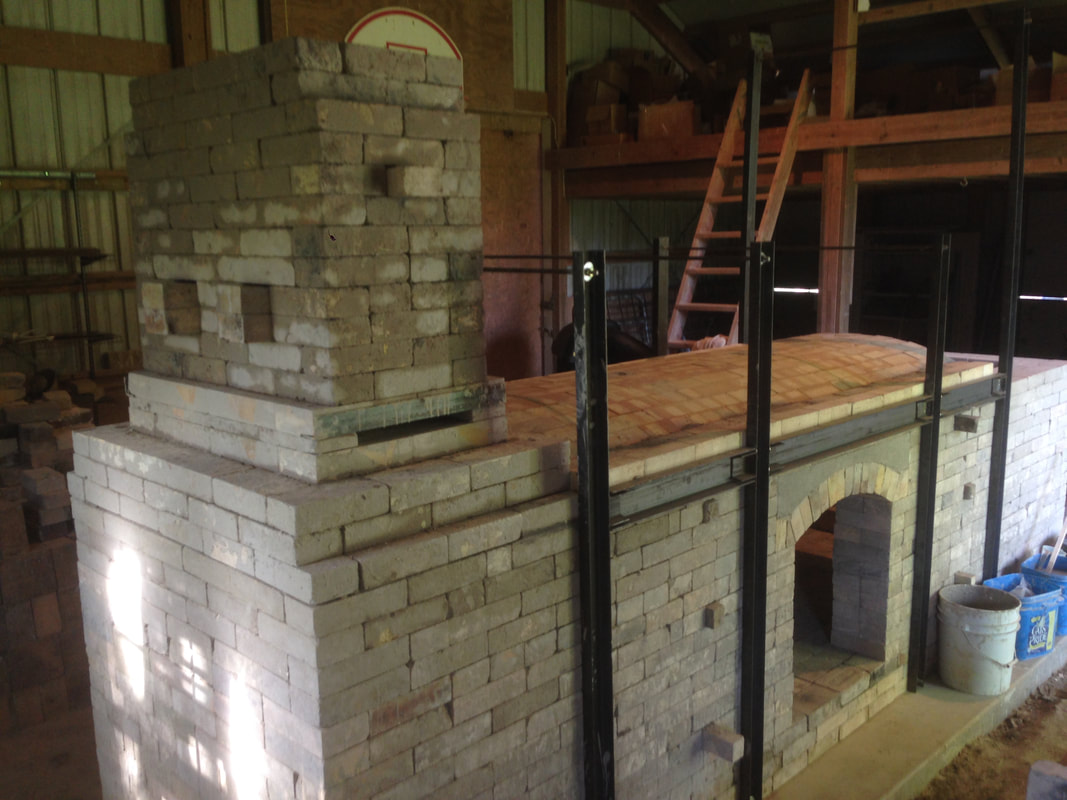
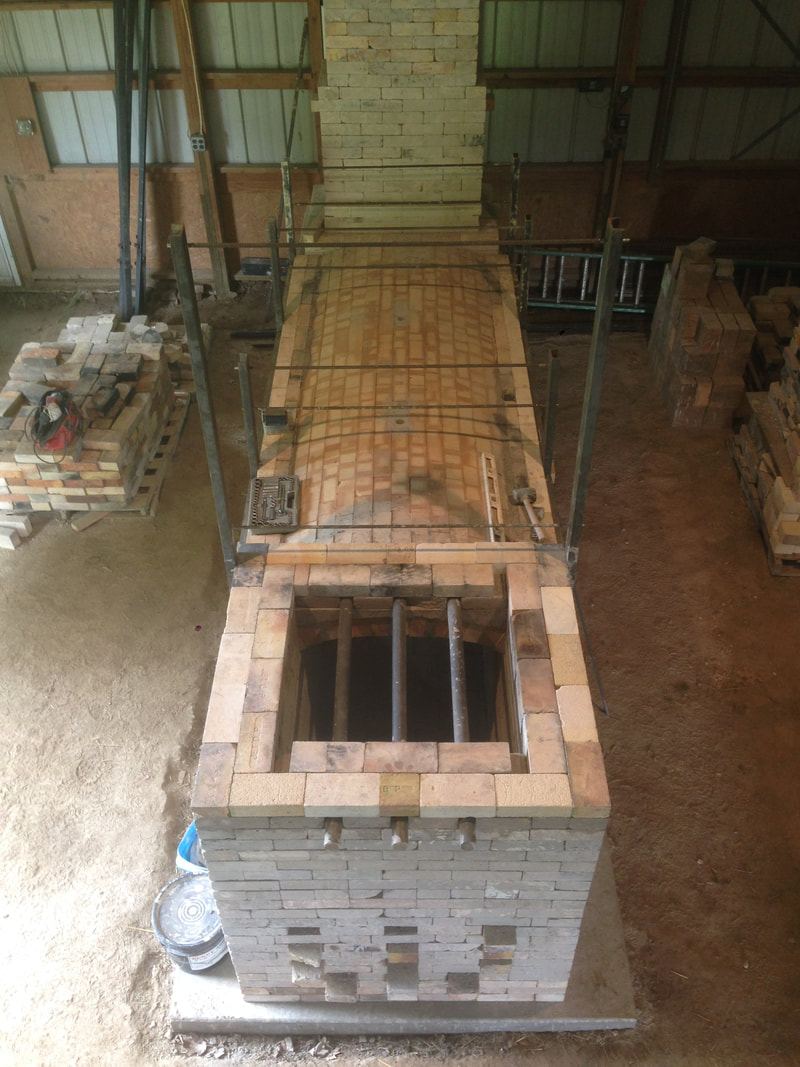
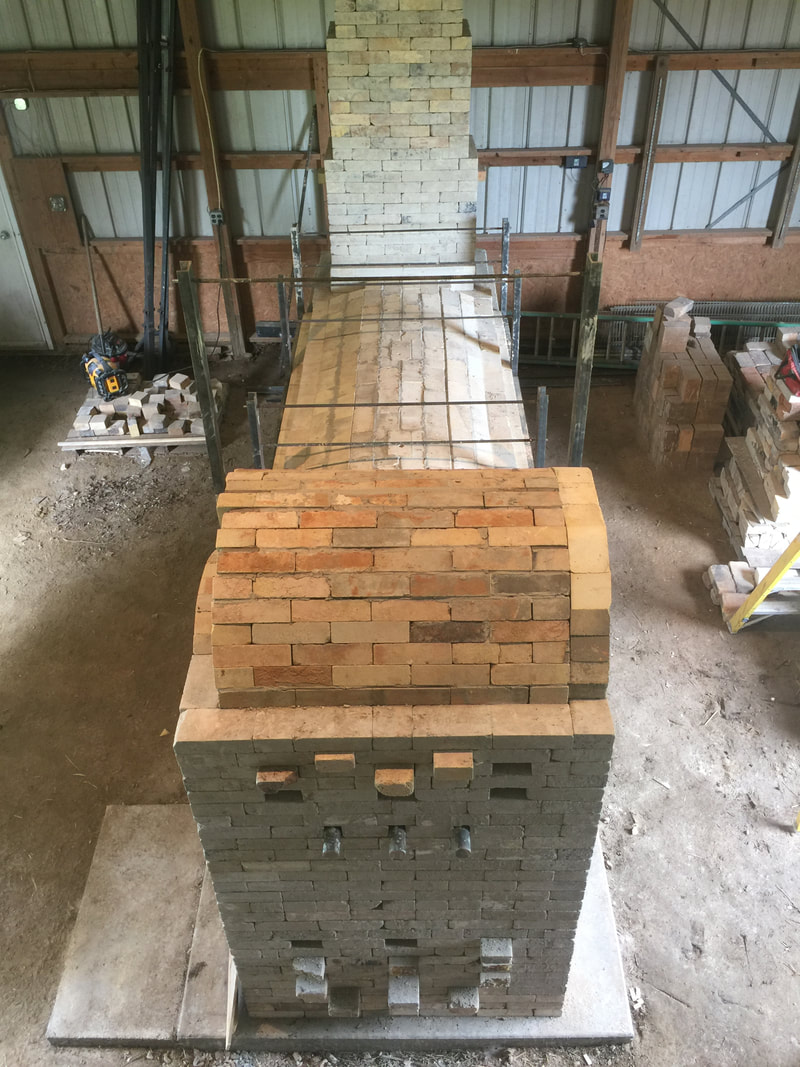
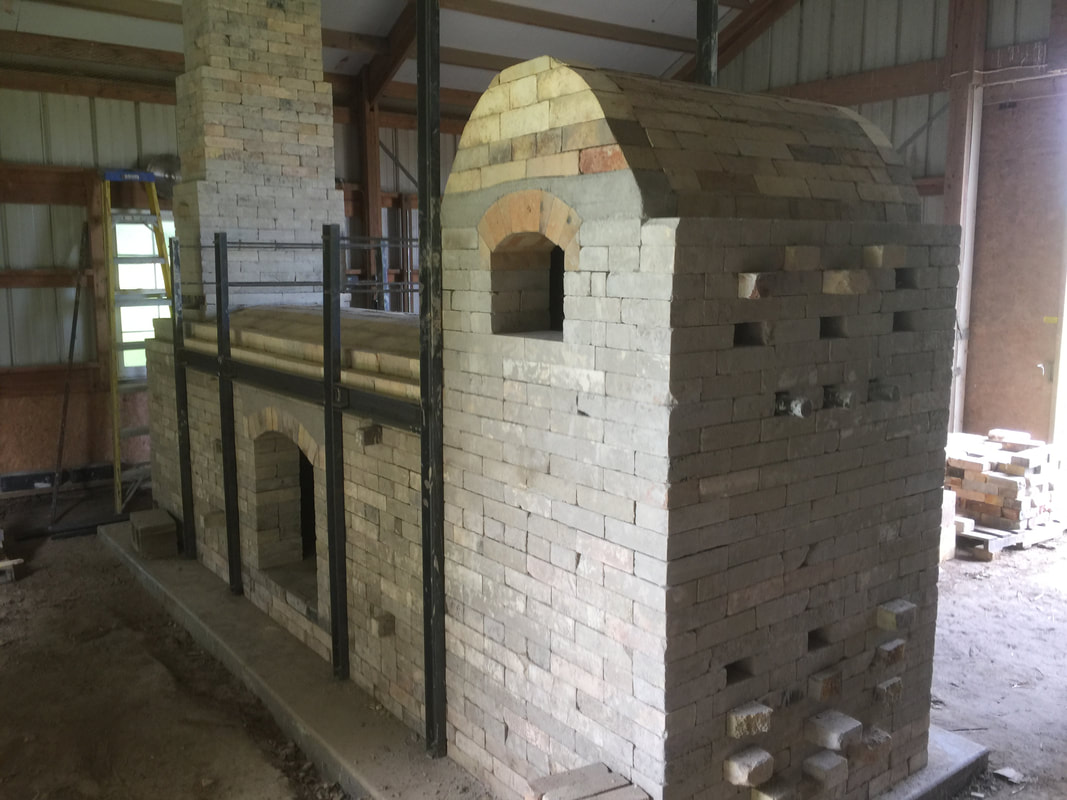
 The Thunder Train is a wood-fired, pottery kiln based off of an elevated bourry-box design, called a "Train Kiln". The footprint is 14' long and 4' wide, with a 20' chimney. The chamber is 46" tall and holds roughly 50 cu. ft. of ware. Construction was a long 9 months, riddled with sweat, blood, laughter, frustration, triumph, failure, and perseverance. The knowledge and experience gained from this project will forever be invaluable to me as I continue on this path and inevitably build more kilns in the future. I want to share some photos, thoughts, and reflections from along the way. For me, this project began at the beginning of my apprenticeship when I arrived in Gresham, Wisconsin in early June 2017. Before I arrived, Simon had deconstructed the train kiln that he had built there so that he could use those brick for the new kiln in Pawnee. Much of the first several weeks of work consisted of cutting, cleaning, re-organizing, re-stacking, and wrapping over 20 pallets-worth of those brick. It was tedious, but necessary work in order to make the rebuild go as smoothly as possible. After making the move to Pawnee, we promptly figured out where we wanted this kiln to sit inside the barn, and began to dig the foundation. 3 days of shovel and pick-axing later, we had a big, beautiful pit. 3' deep around the perimeter, and 1' deep in the center. The soil was dense and gummy, full of clay and silt, and proved to be very challenging to remove from the ground. Wheel barrow by wheel barrow, we piled it up behind the kiln shed with material testing in mind down the line. I had just discovered the musician, Sixto Rodriguez, and was listening to his album, Cold Fact, on repeat as I burrowed deeper into the earth. ...Woke up this morning with an ache in my head, I splashed on my clothes as I spilled out of bed, I opened the window to listen to the news, but all I heard was the establishment's blues...
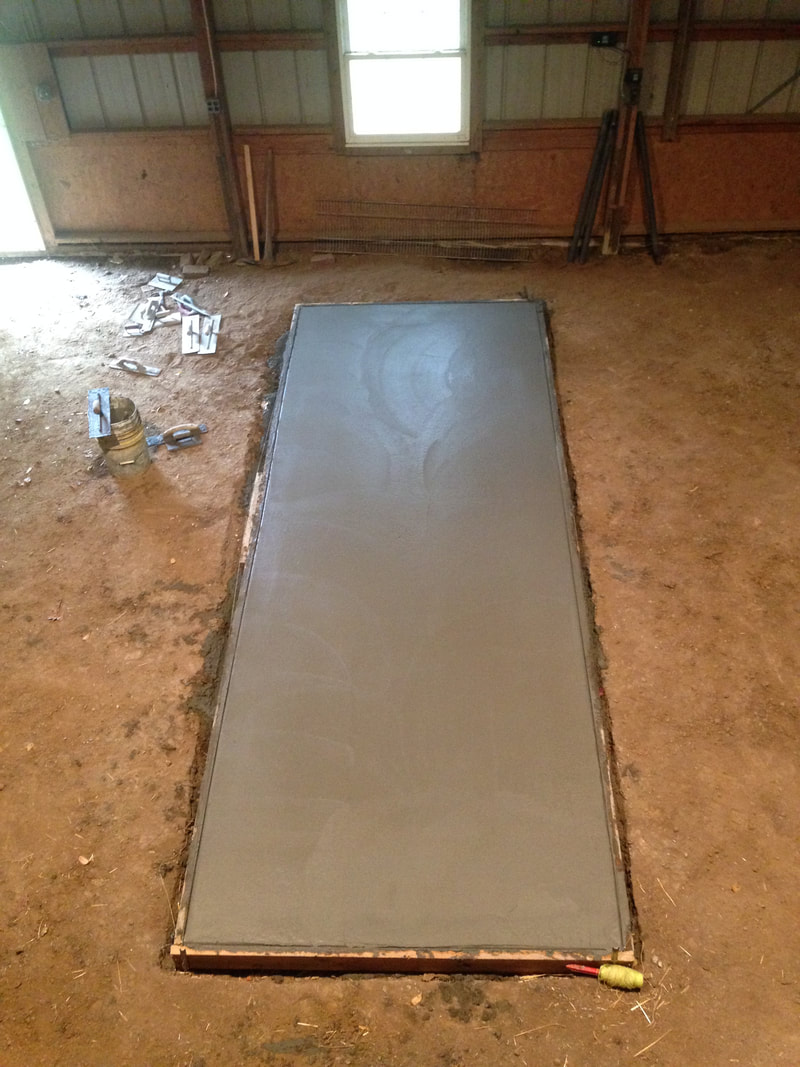
The day after we finished removing all of that earth from the pit, the concrete guys came and filled it right back up again. I had mixed emotions about that.
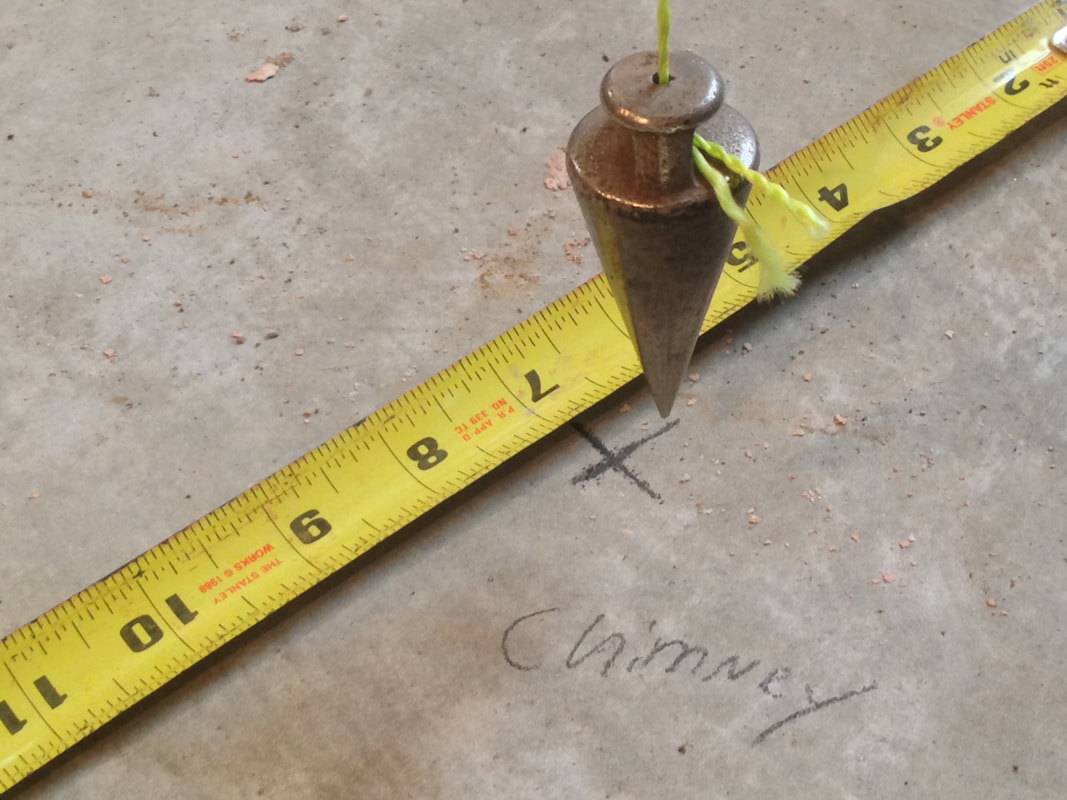
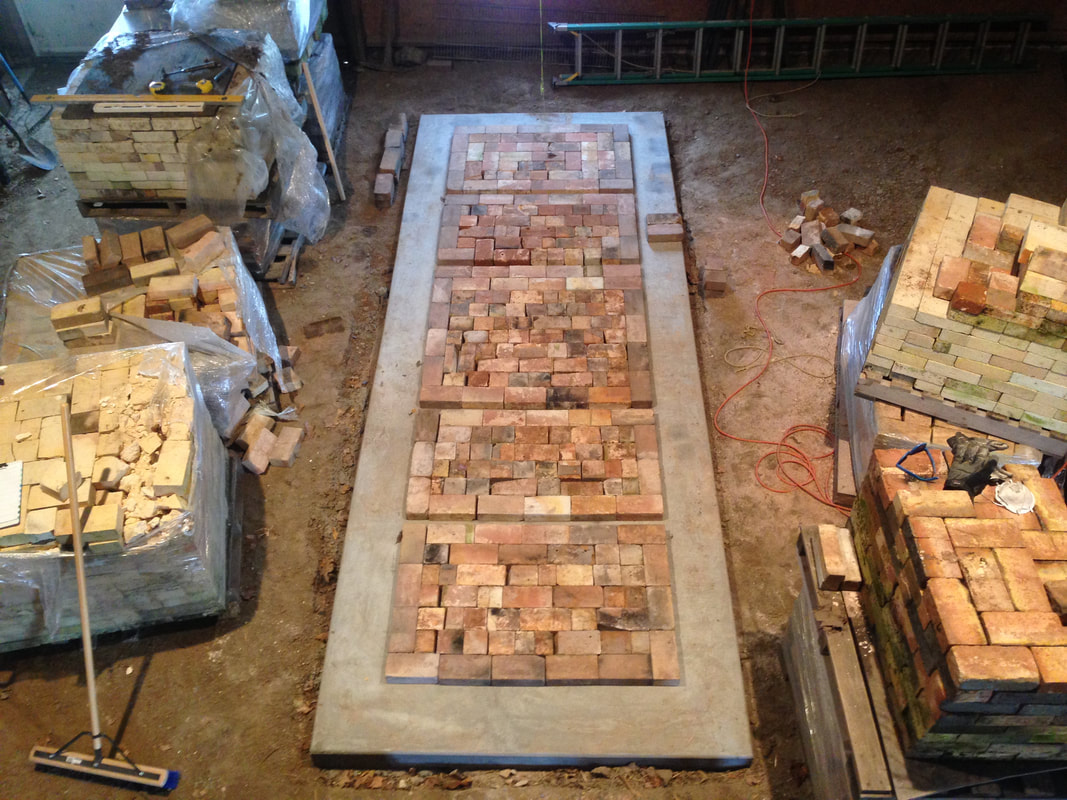
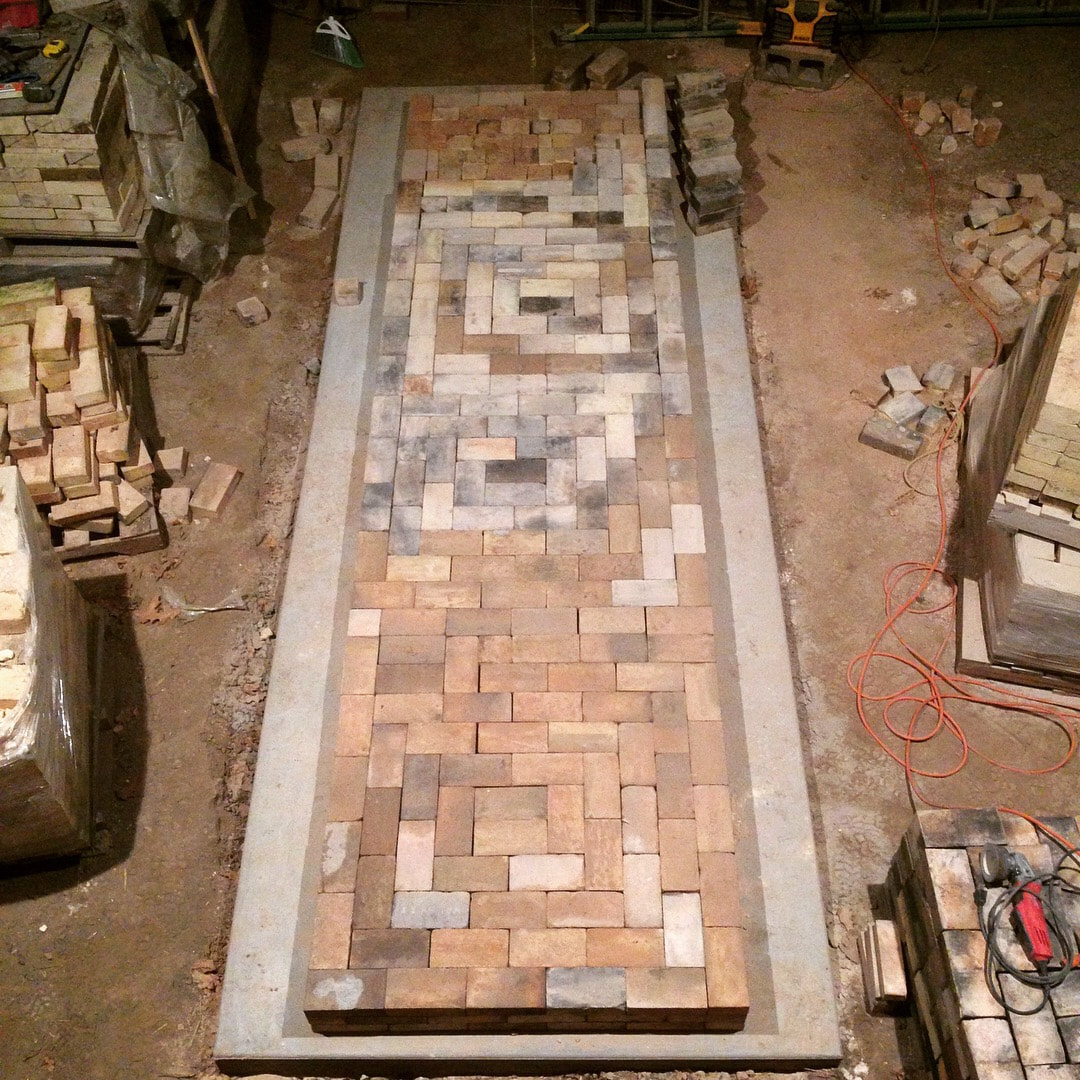
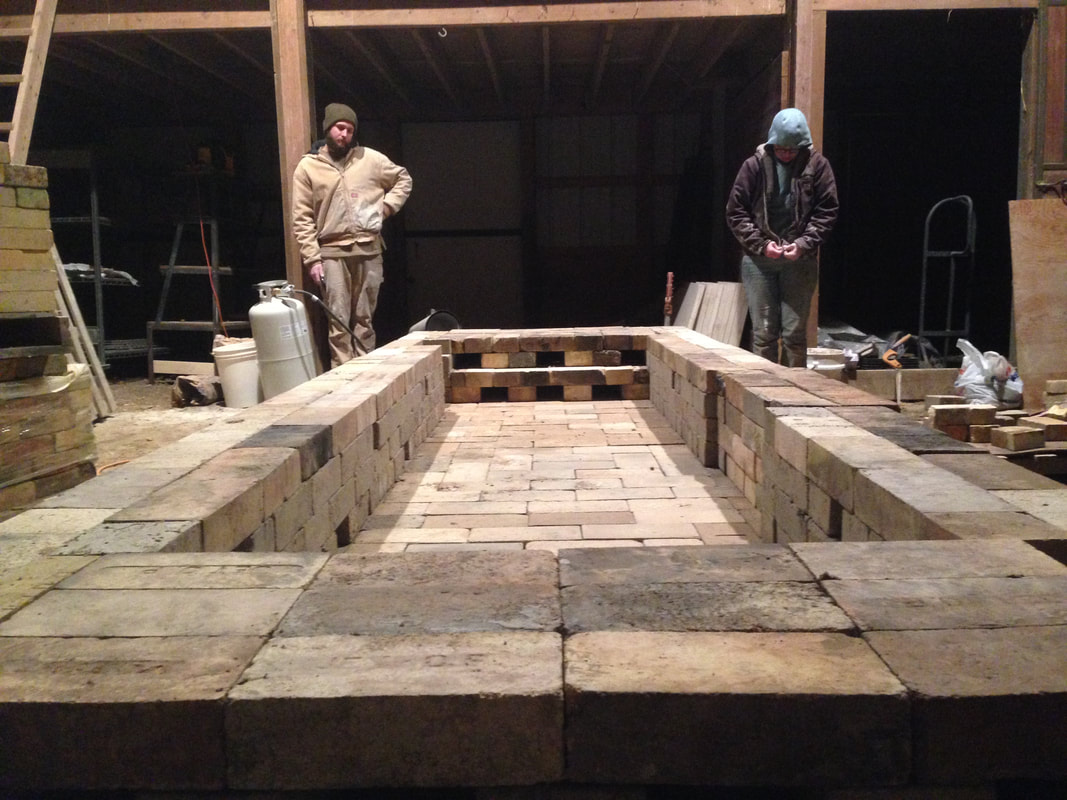
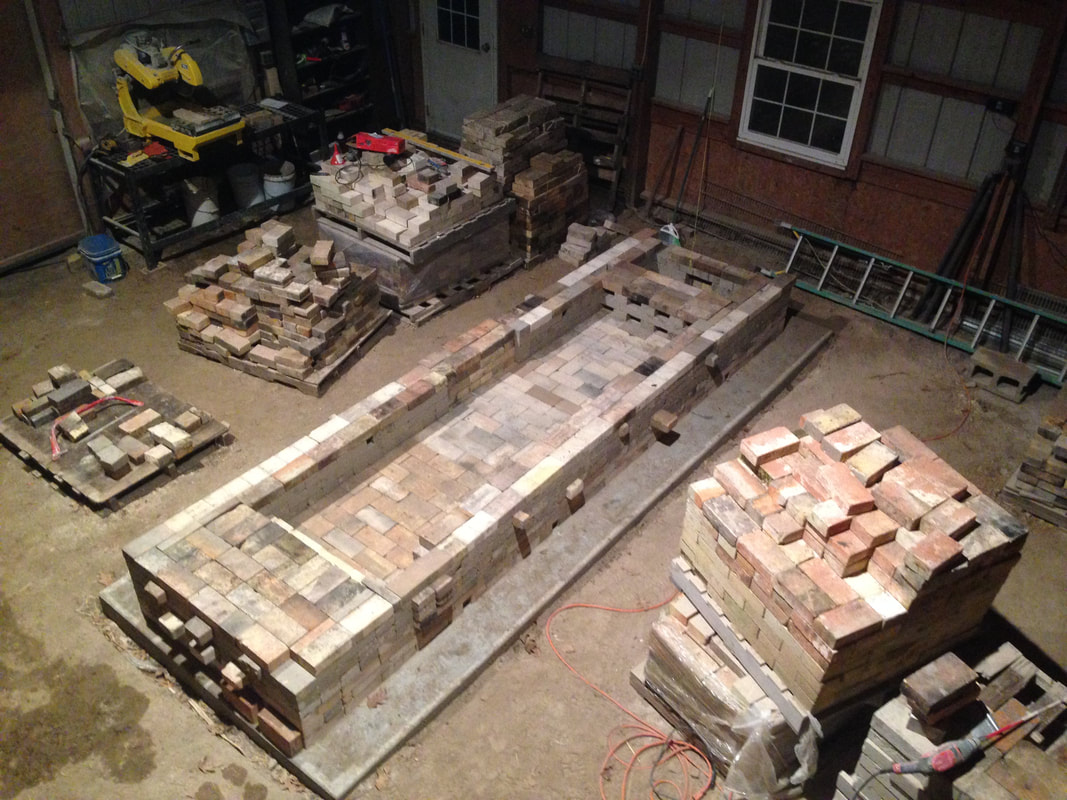
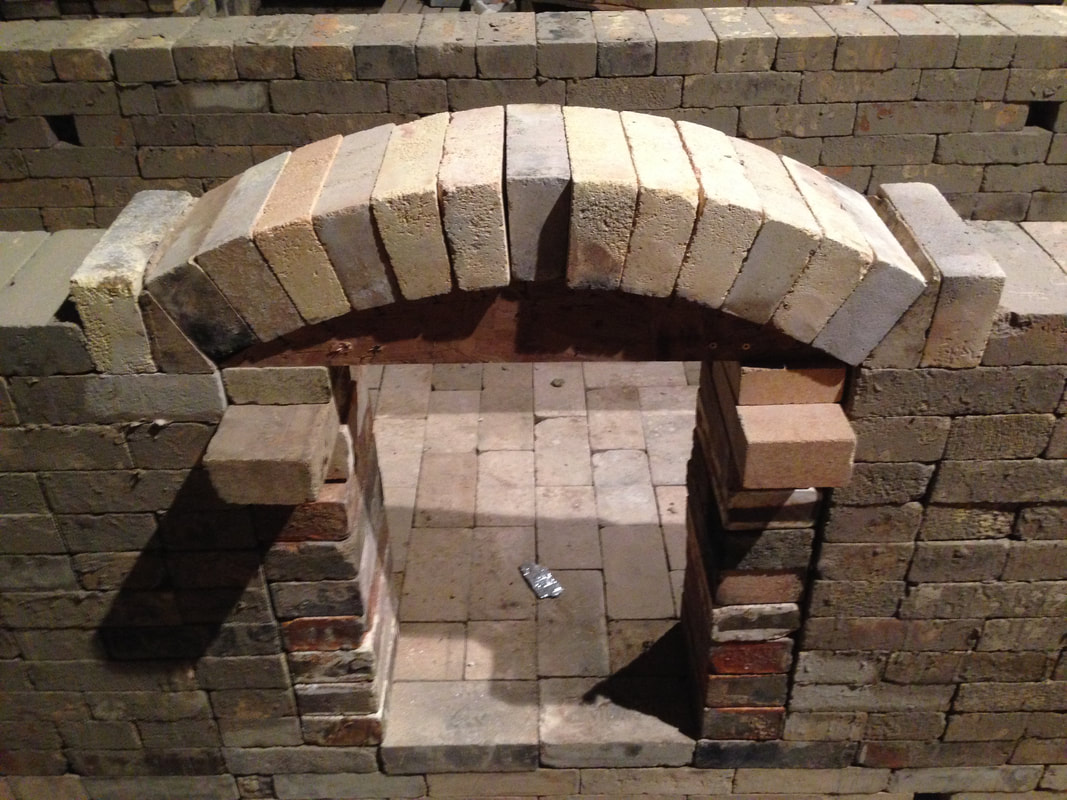
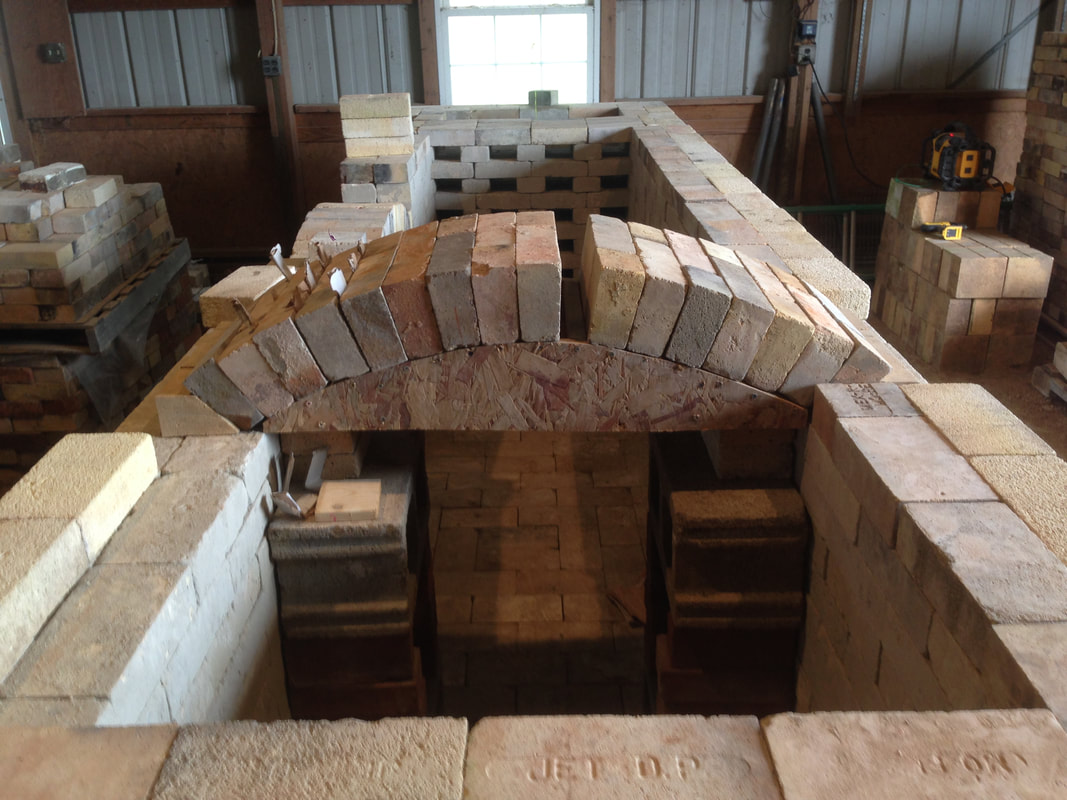
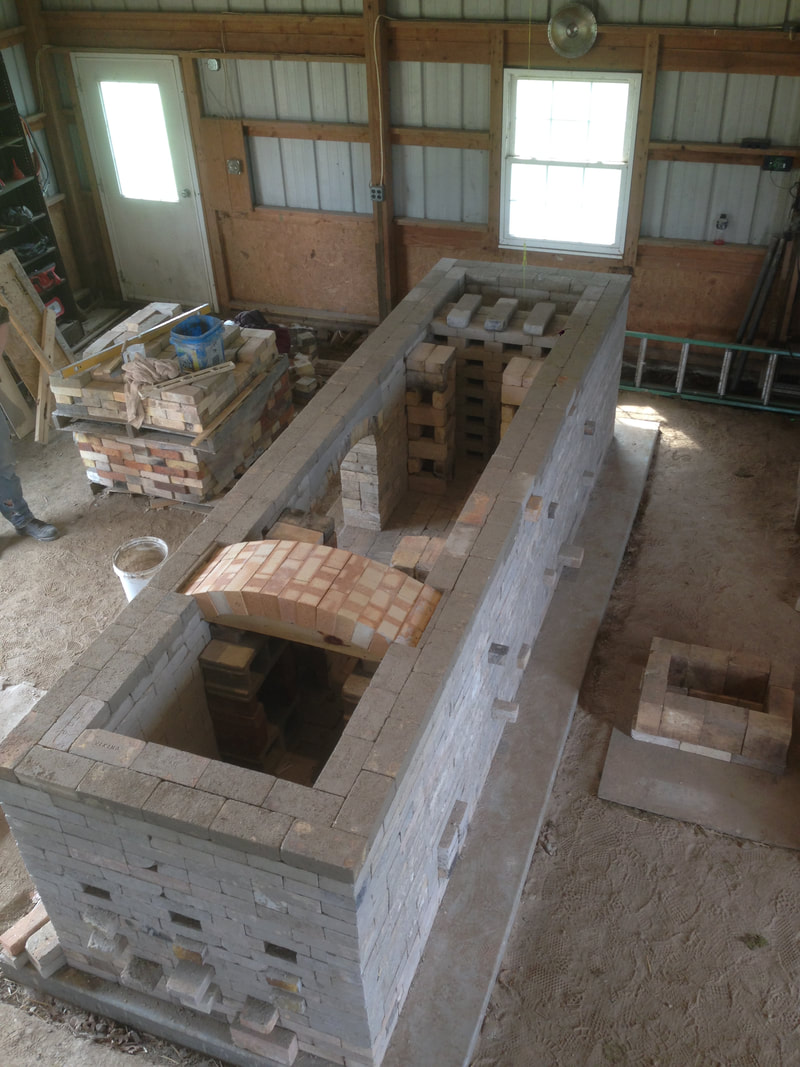
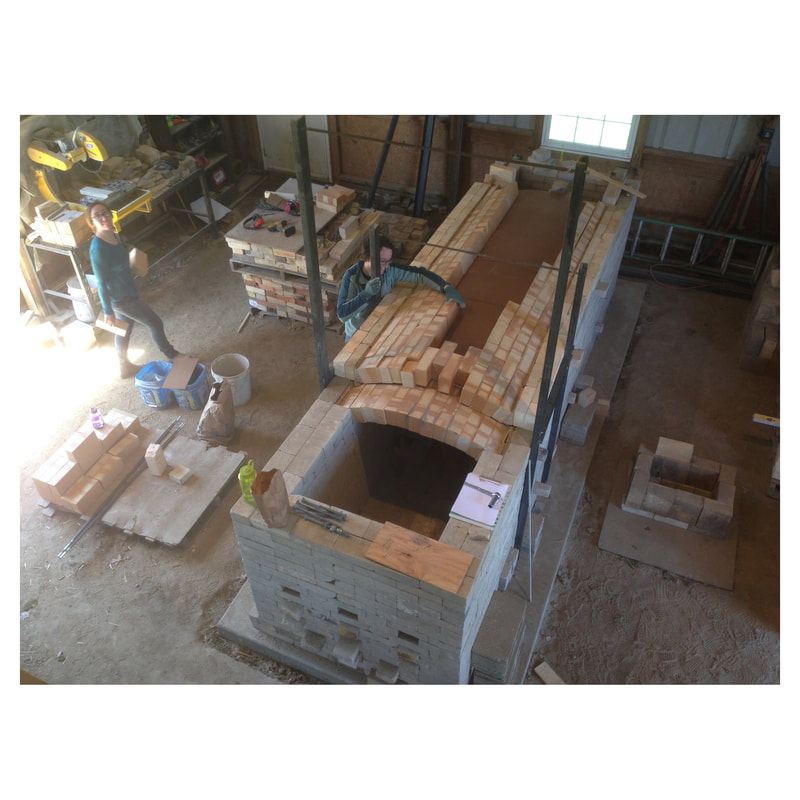
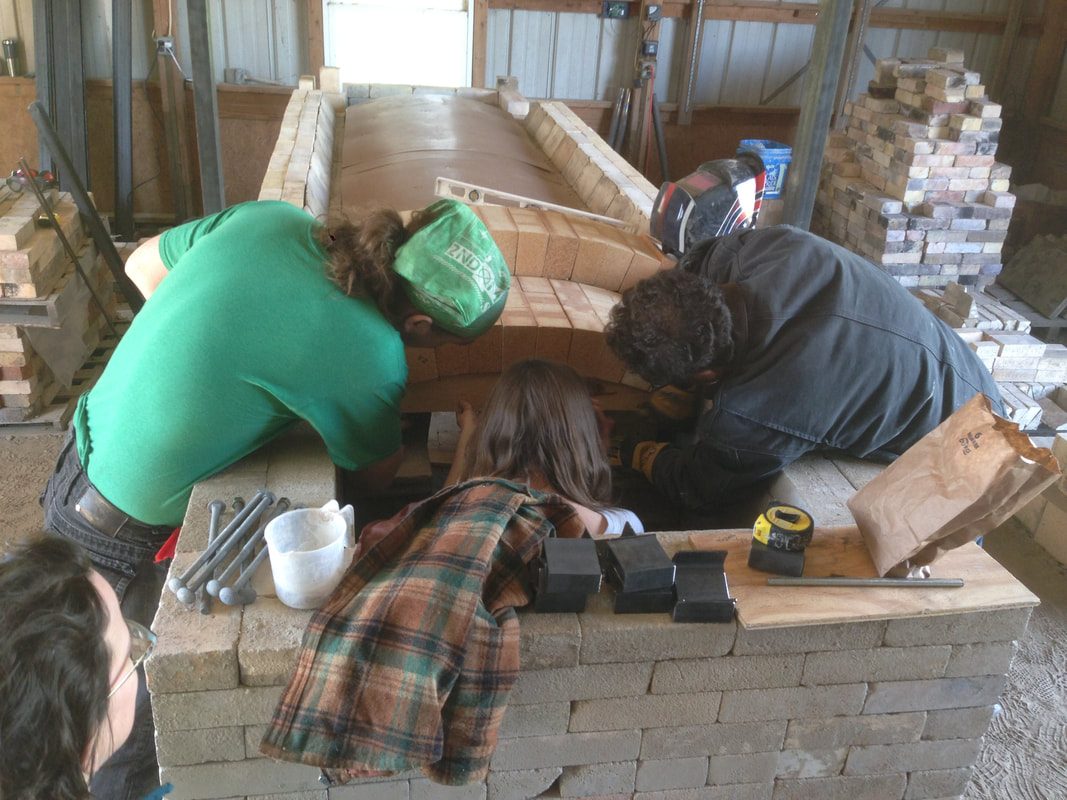
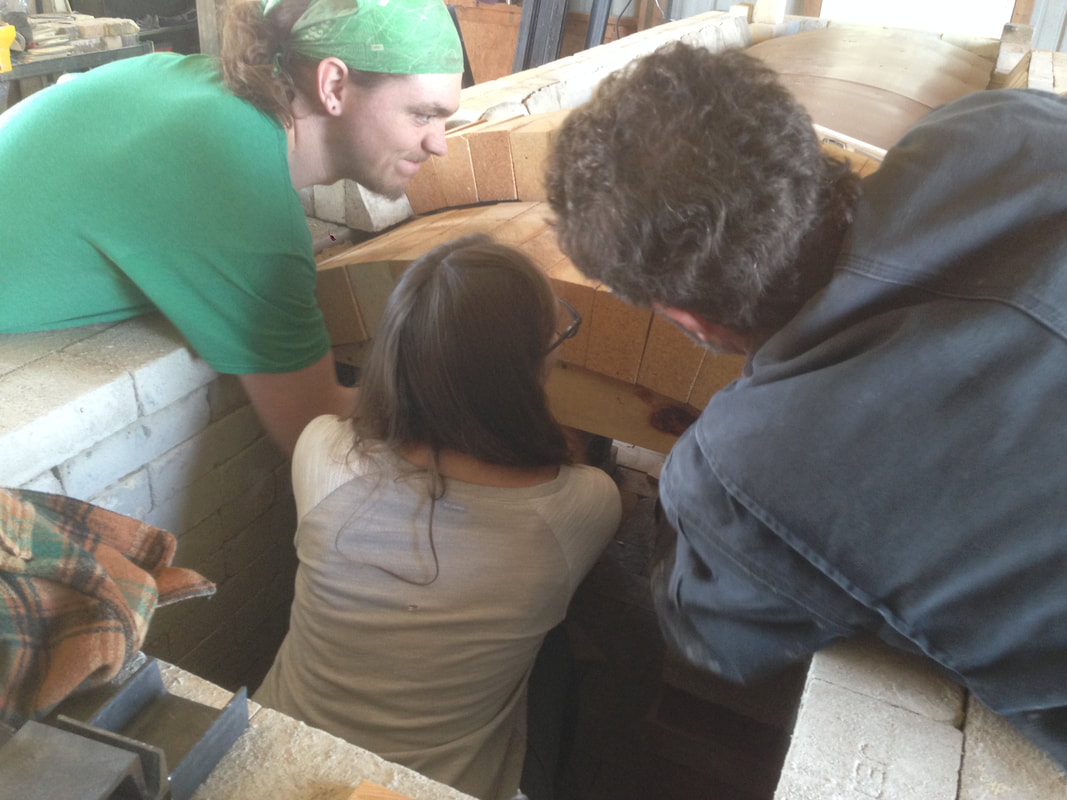
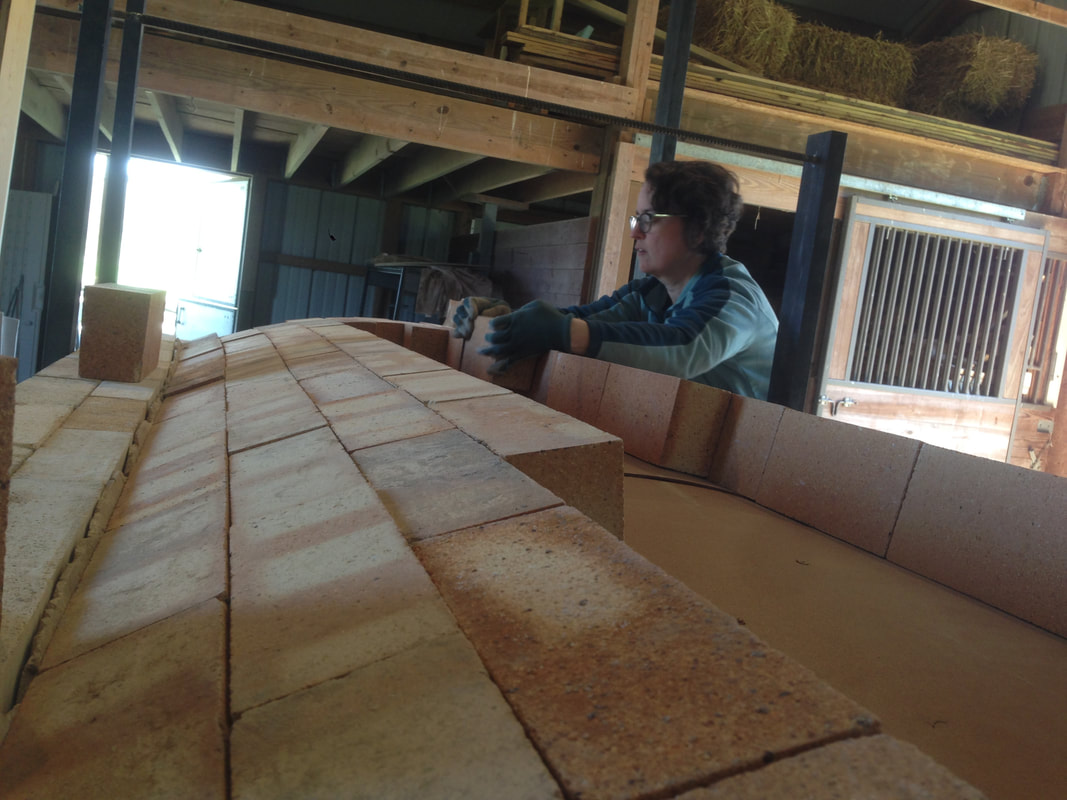
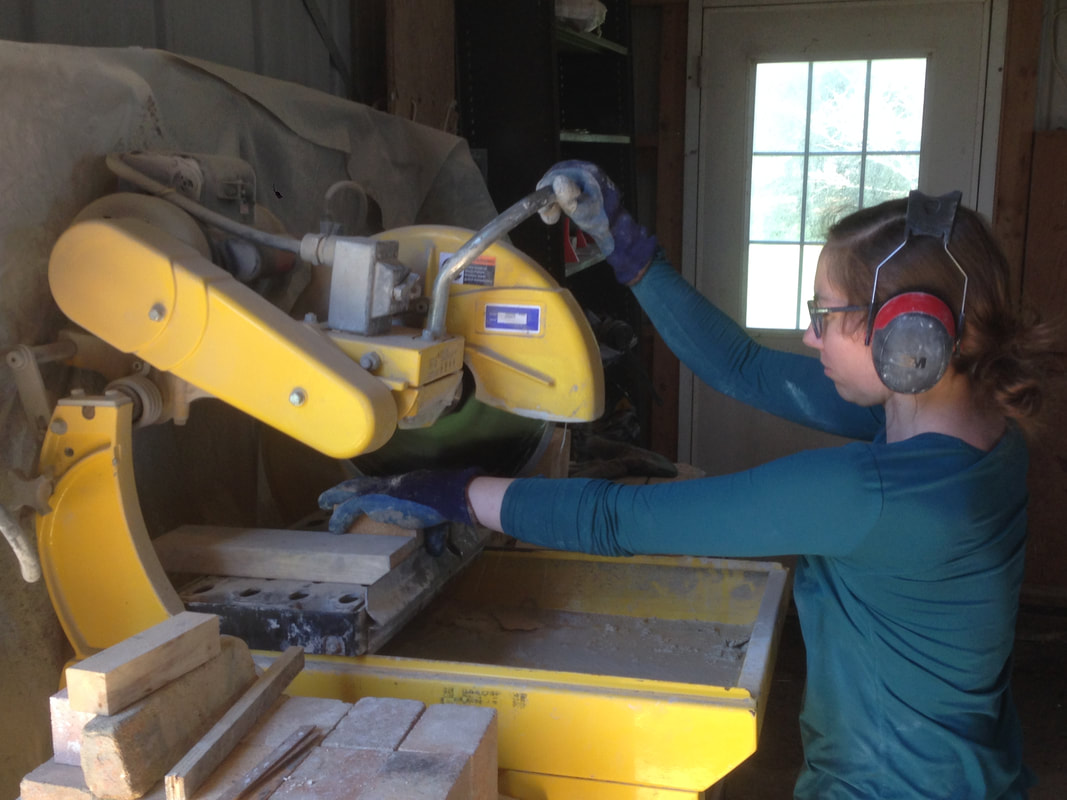
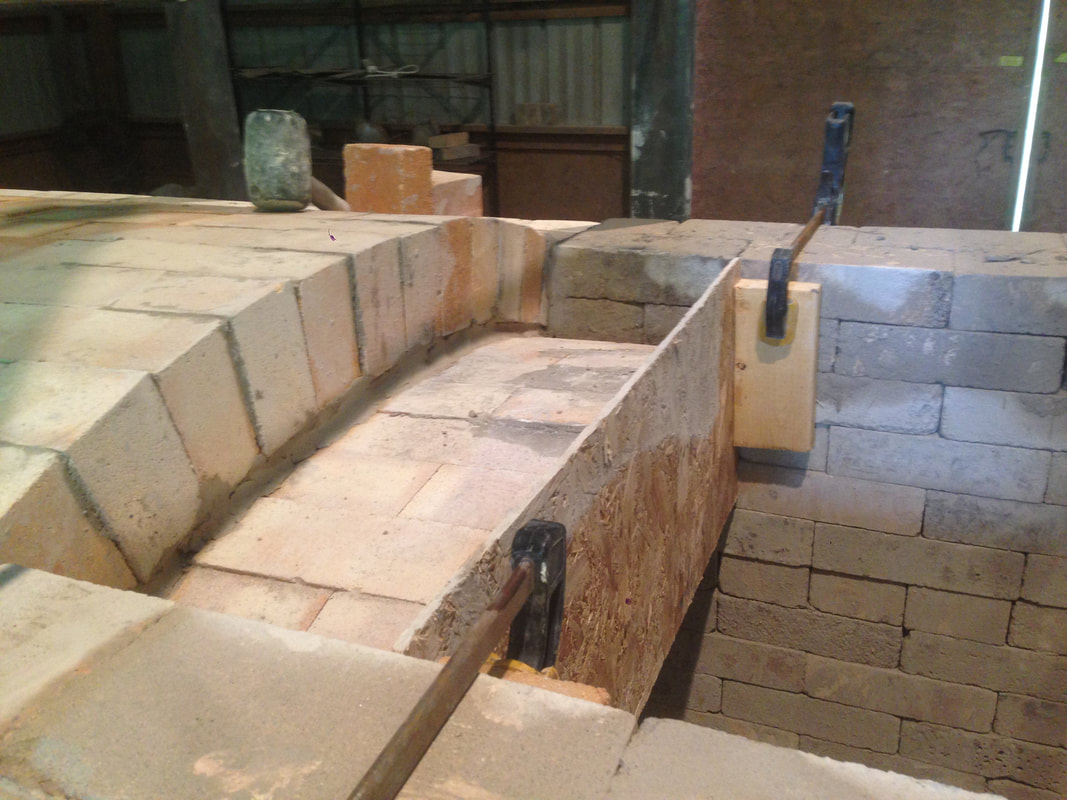
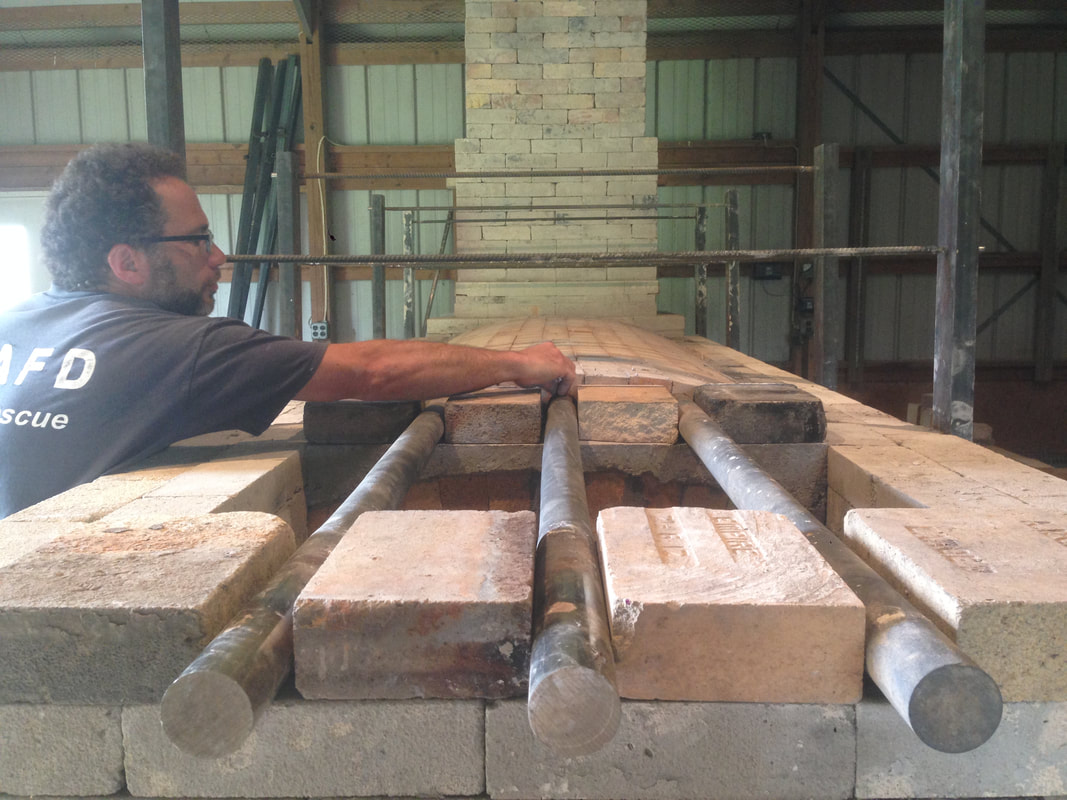
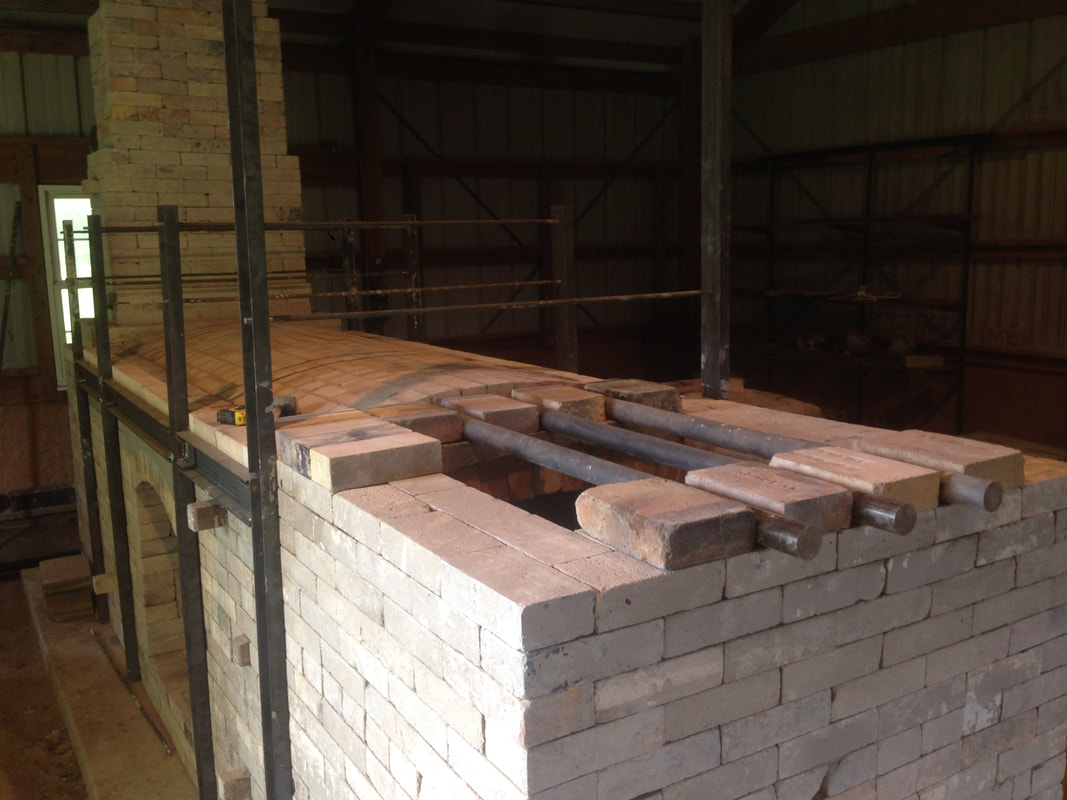
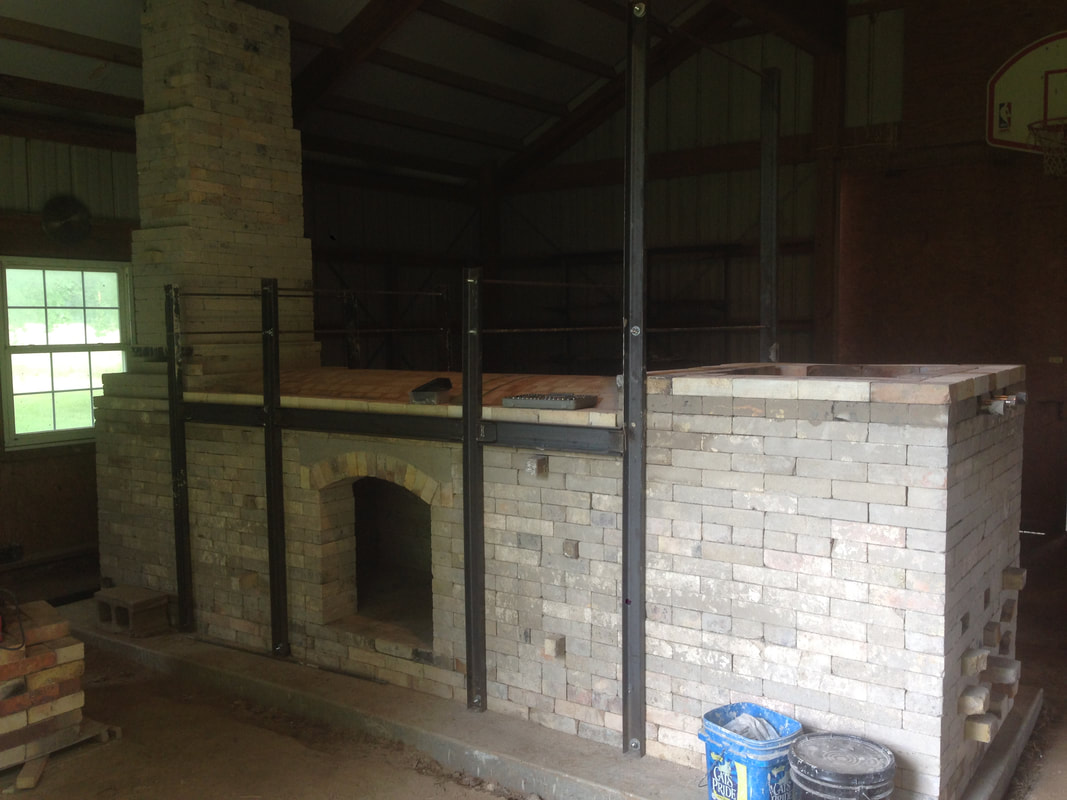
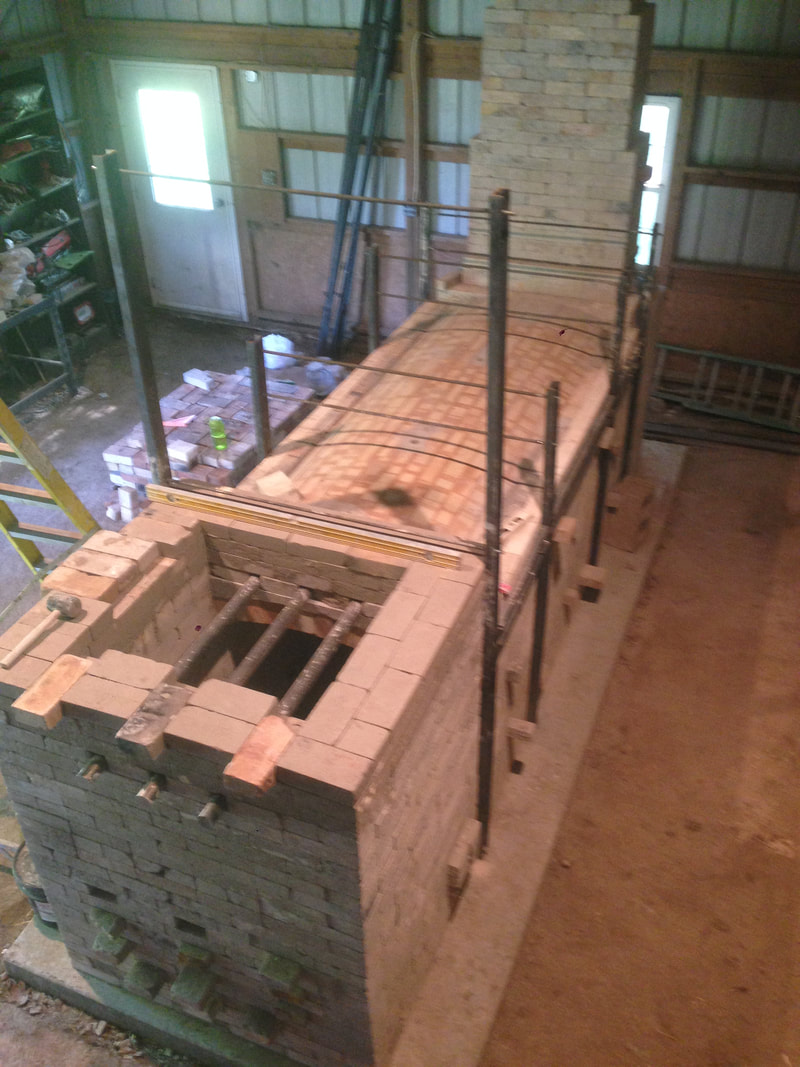
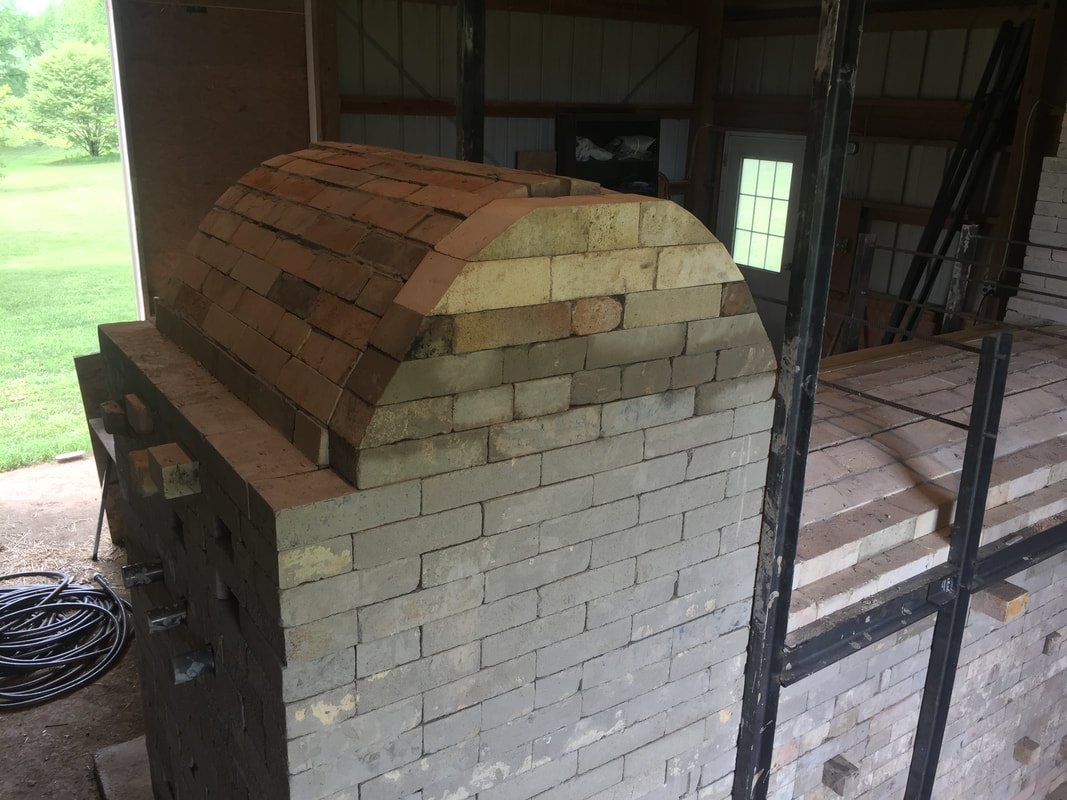
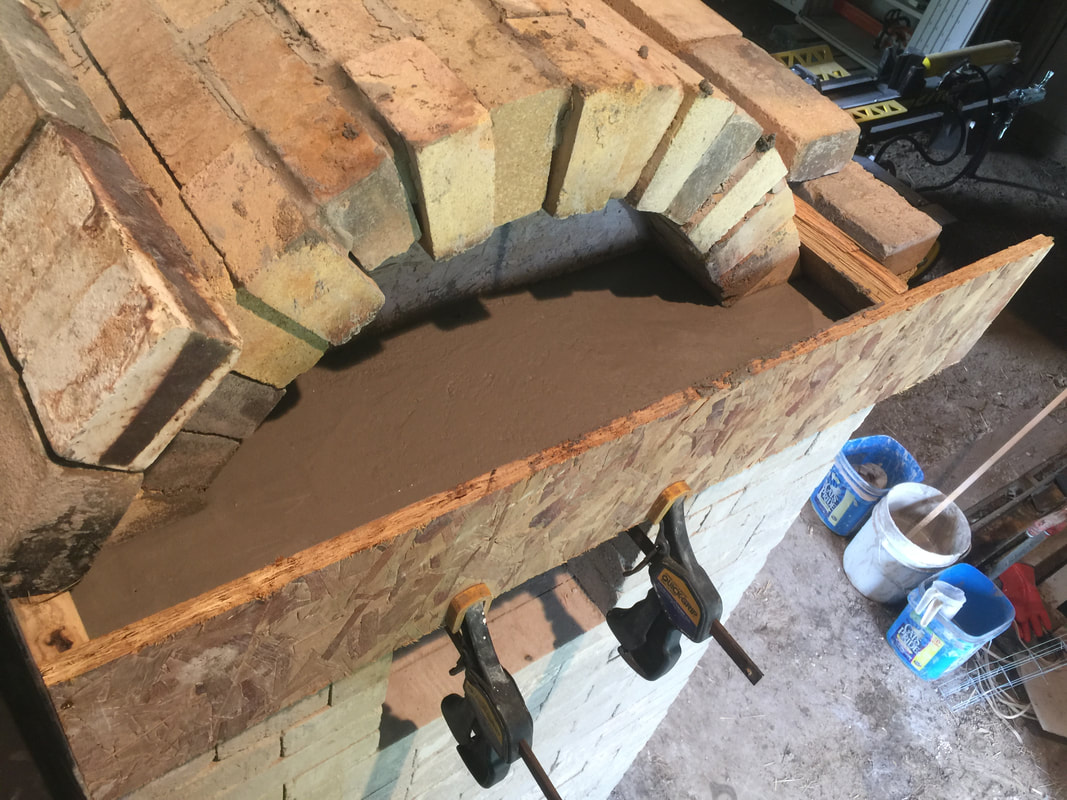
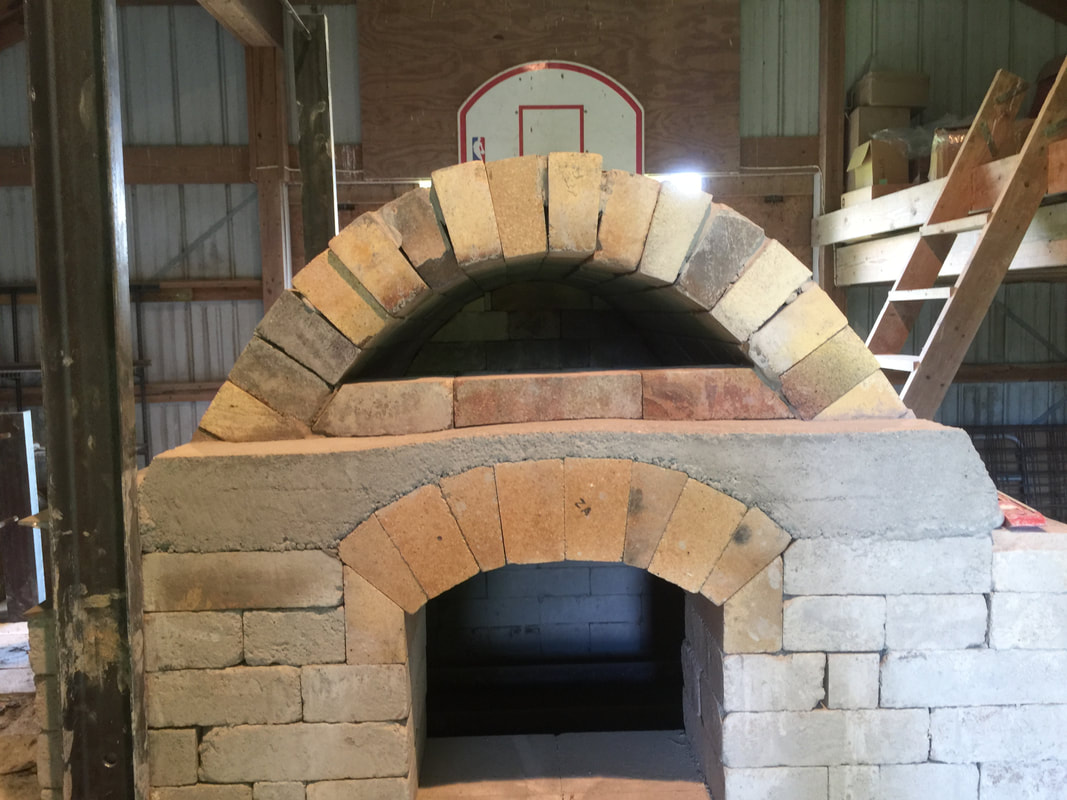
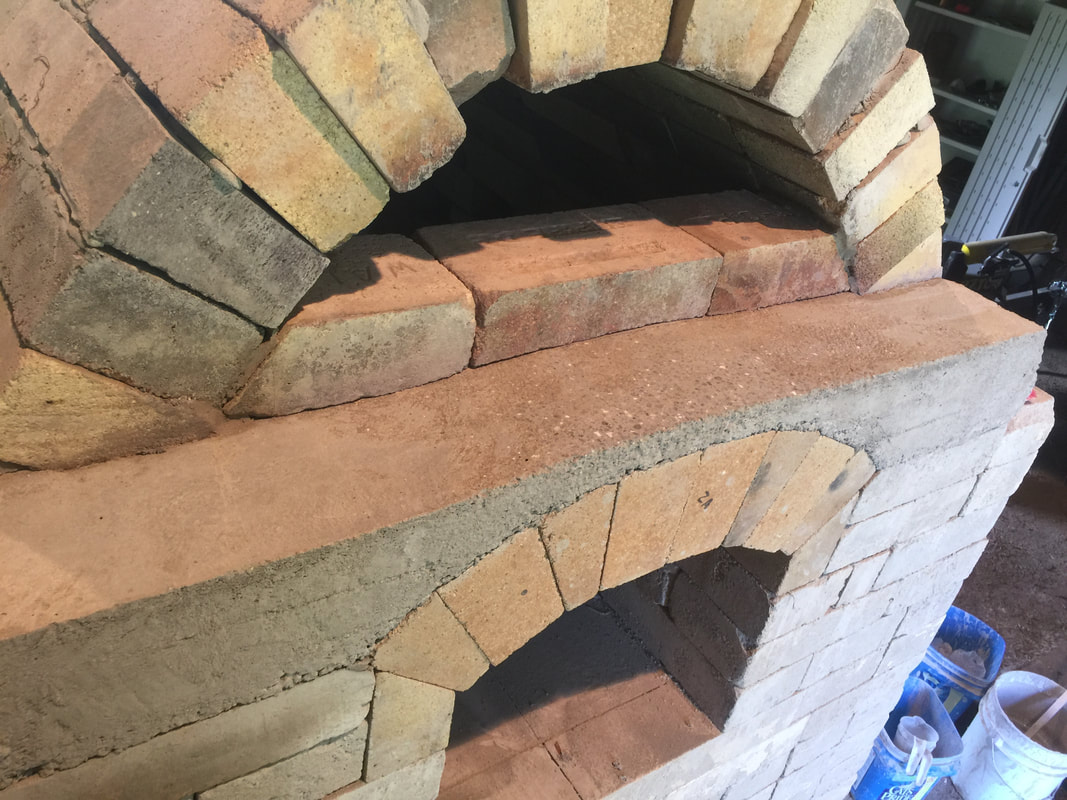
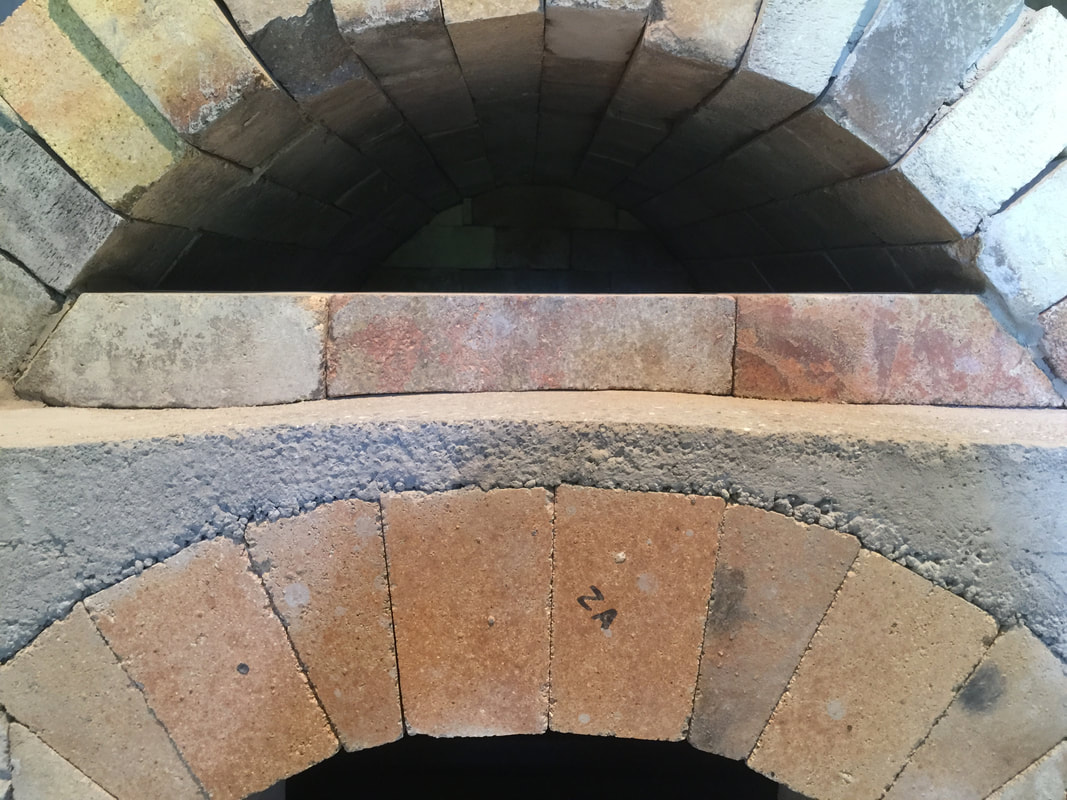
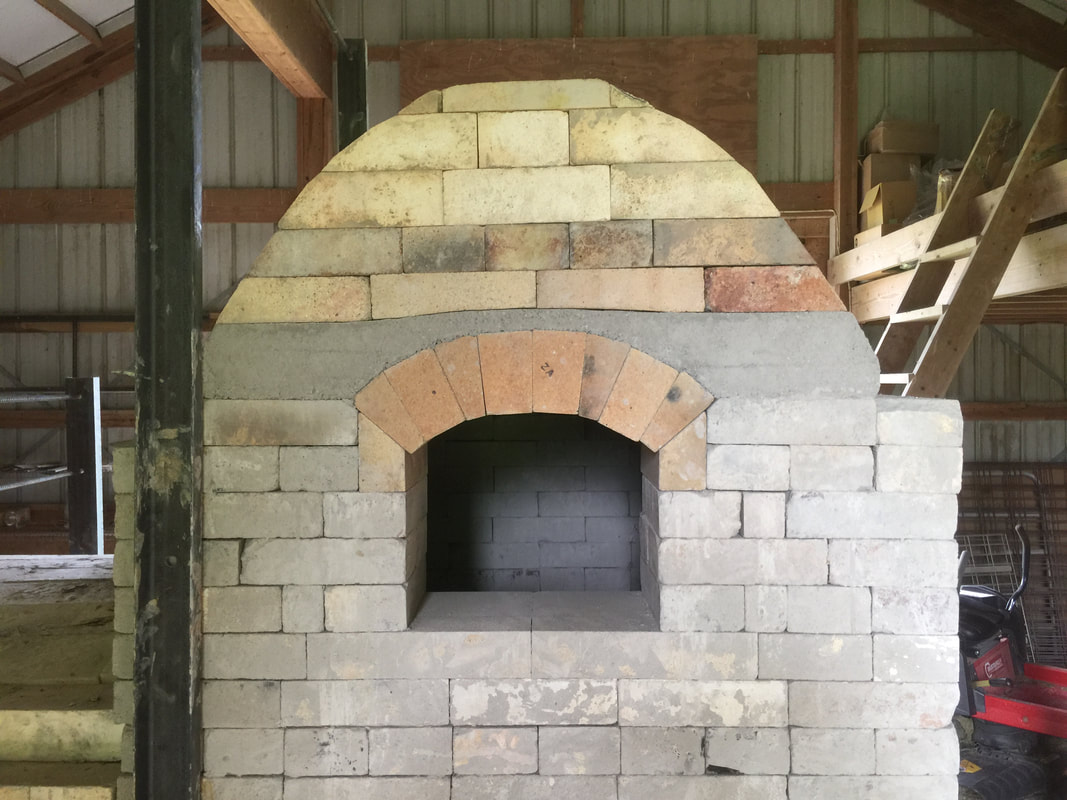
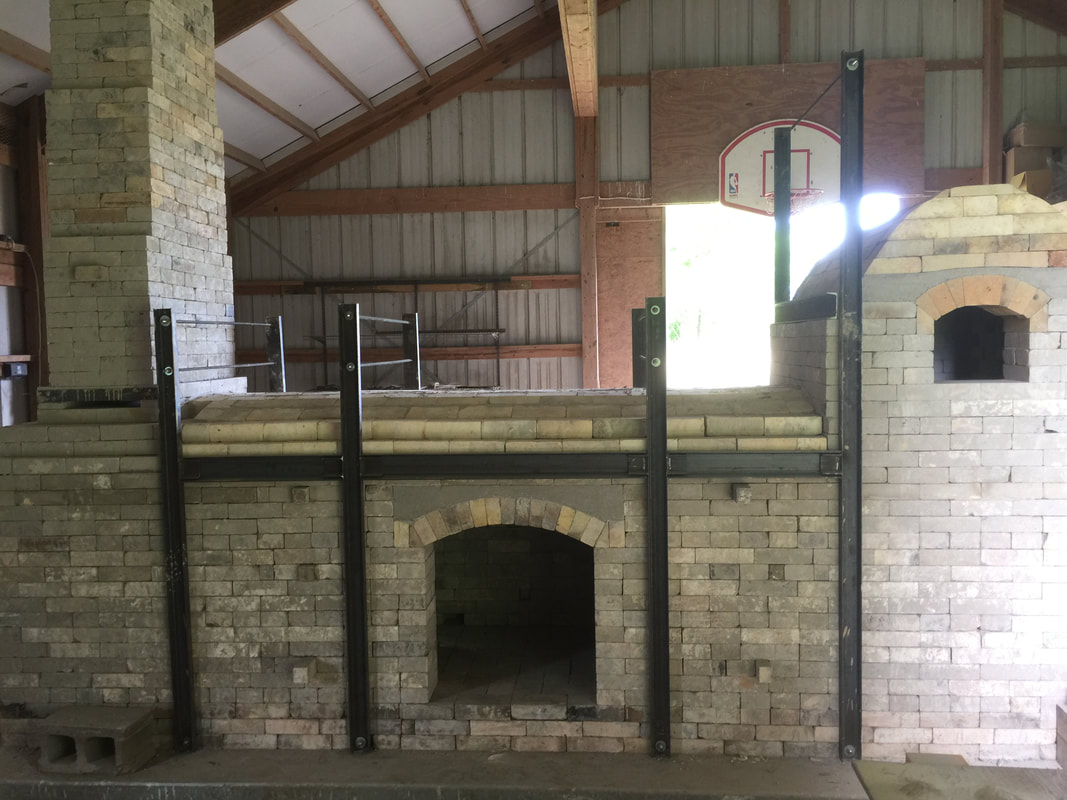
With the pad poured, it was finally time to start laying brick! Simon and I specked out the footprint and mapped out some lines just in time for him to leave for his month-long residency at La Maridiana Ceramics School in Italy. While he was away, the brick showed up on the flatbed truck and our new friend Greg brought his front-loader over to help me get them unloaded. I laid out the first couple of layers of brick leaving gaps in the bottom layer so that we would later be able to tie the steel frame together from both above the kiln, and below it. 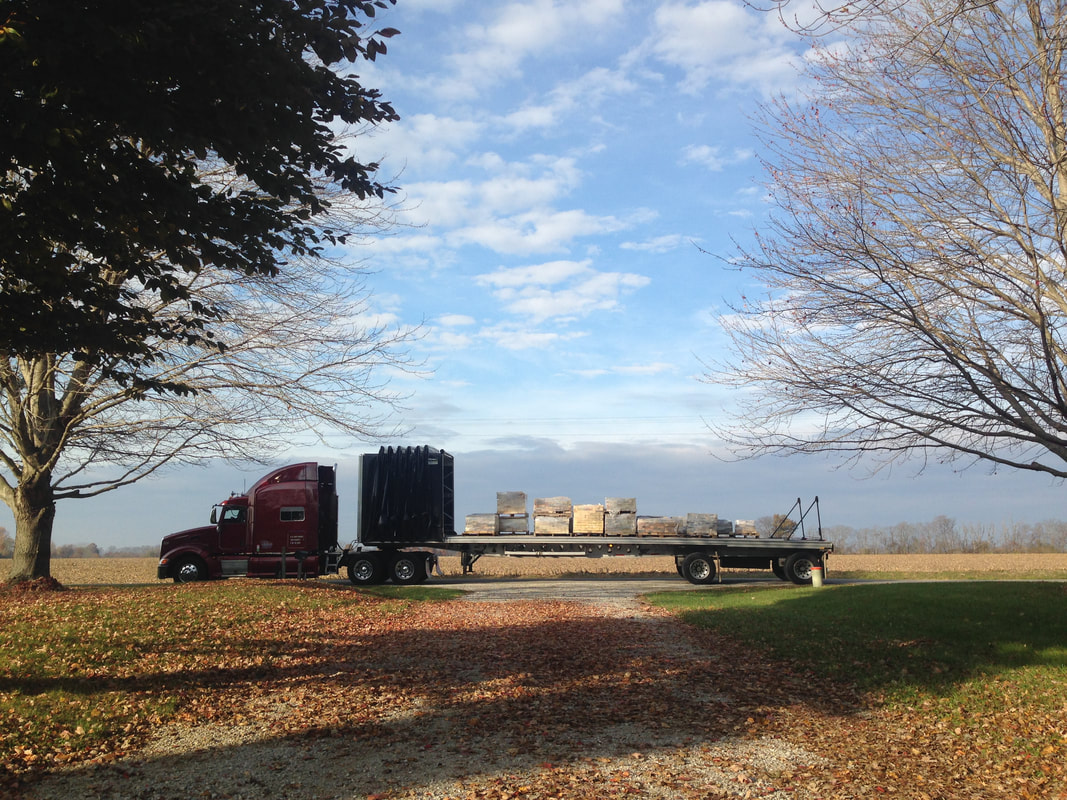 The brick arrives at Mill Creek South. Upon Simon's return, we organized a work party to make some strides in the build. This week we were joined by Ian Connors, Lars Voltz, Amy Song, and Katy Schroeder. At this point there were single-digit temperatures outside. We had the jet propane heater blasting while our teeth chattered and fingers froze. Despite the unfriendly conditions, the company made for a good time. I must say, building with a crew makes the process loads more fun. In this week, we made it from the floor, up to dropping the loading door arch. With the bitter cold showing no sign of relenting, we put the kiln on pause to focus on building the studio. After all we did need to have a place to make pots for this kiln, right? It wasn't until about 4 months later that we blew the kiln conch and assembled a crew for another week of building! This time we were again graced with the presence of Amy and Katy, with the addition of a new friend, Pip. This was a productive and satisfying week. We laid up the throat arch, the main chamber arch, and fabricated and installed the majority of the steel frame and buttressing. The throat arch (smaller arch spanning the width of the chamber) is a very crucial part of this kiln design. Its purpose is to support the rear end of the elevated firebox. Whereas all 3 of the other sides of the firebox are supported straight up and down by the walls, this arch is necessary for that 4th side which spans the chamber. It gave us a lot of trouble, and we actually ended up removing a few of the brick and casting the space after the first firing. Can't forget a few action shots of the crew... 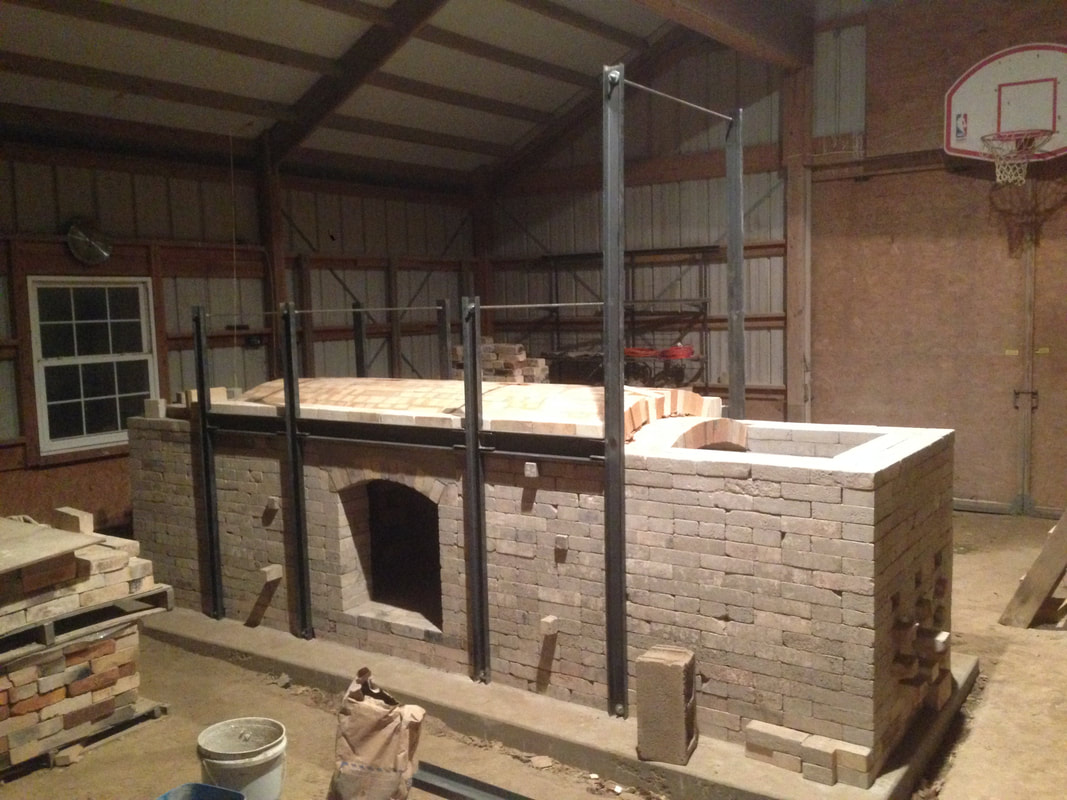 Progress after work party #2 Next we began work on the chimney and bourry box. Our chimney is about 20' tall and korbels in 9" from bottom to top. We had to make the chimney extra tall so that it could clear the eve of the barn's roof. We built in plenty of passive air above the dampers just in case the tall chimney pulled a little too hard, but we haven't needed to use them yet. Simon has taught me that it's always a good idea to build in solutions like that, just in case. To start on the bourry box, we cast a flat area above the throat arch, level with the surrounding walls. Three, 2" thick stainless steel grate bars are laid on top. These catch the wood that we stoke into the kiln, and hold it up above the coal pit below while it burns. Just as the grate bars are placed, and the bourry box begins to go up, we paused again for Simon's two week workshop at the Penland School of Crafts in North Carolina. Upon our return from Penland, we get right back to work on the bourry box. We managed to get both the main arch and the door arch laid up before Simon left a few days earlier than me for his Intimate Anagama workshop up in Wisconsin. It was my goal in the few days before I left, to get the space above the door arch cast, and to fill in the wall under the main arch. I built the form and poured the castable and was just a hair short of what I needed. As a result I had a slightly off-kilter surface to build from. My solution was to grind the first layer of brick down until they laid level again. It is quite a funny sight. At this point, the profile of the kiln looks pretty much like it will when finished. We are hungry to fire, and I can just about hear the wood crackling inside the firebox.
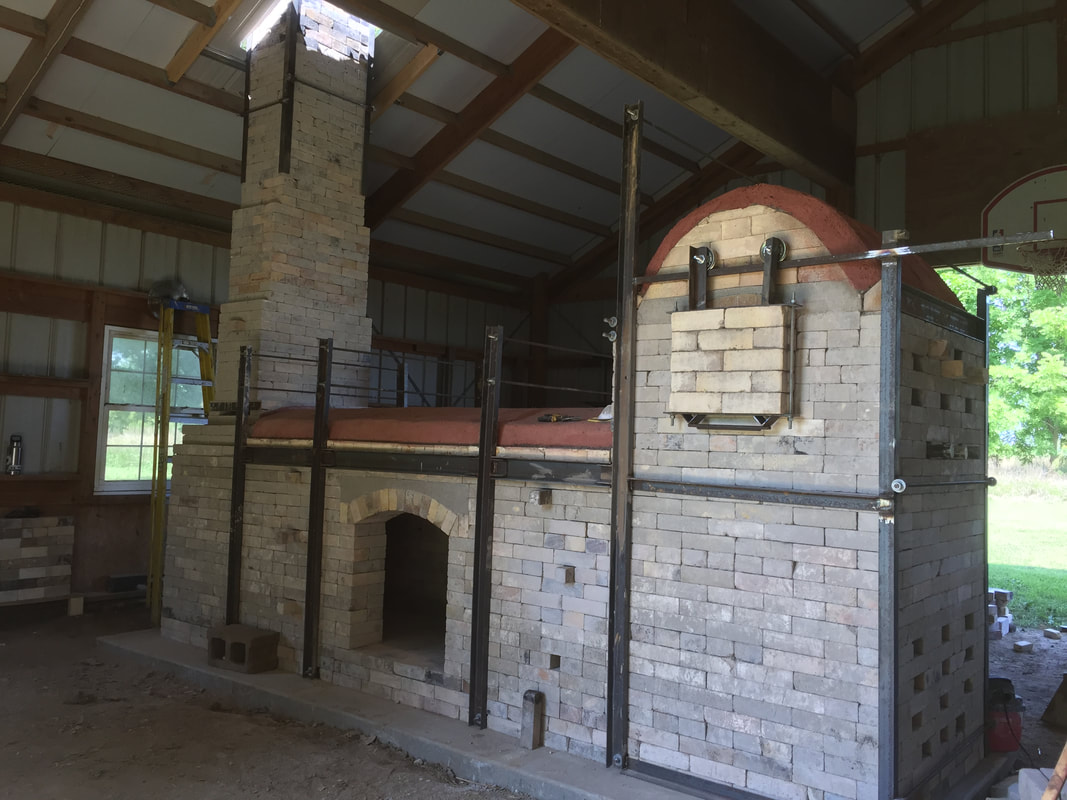
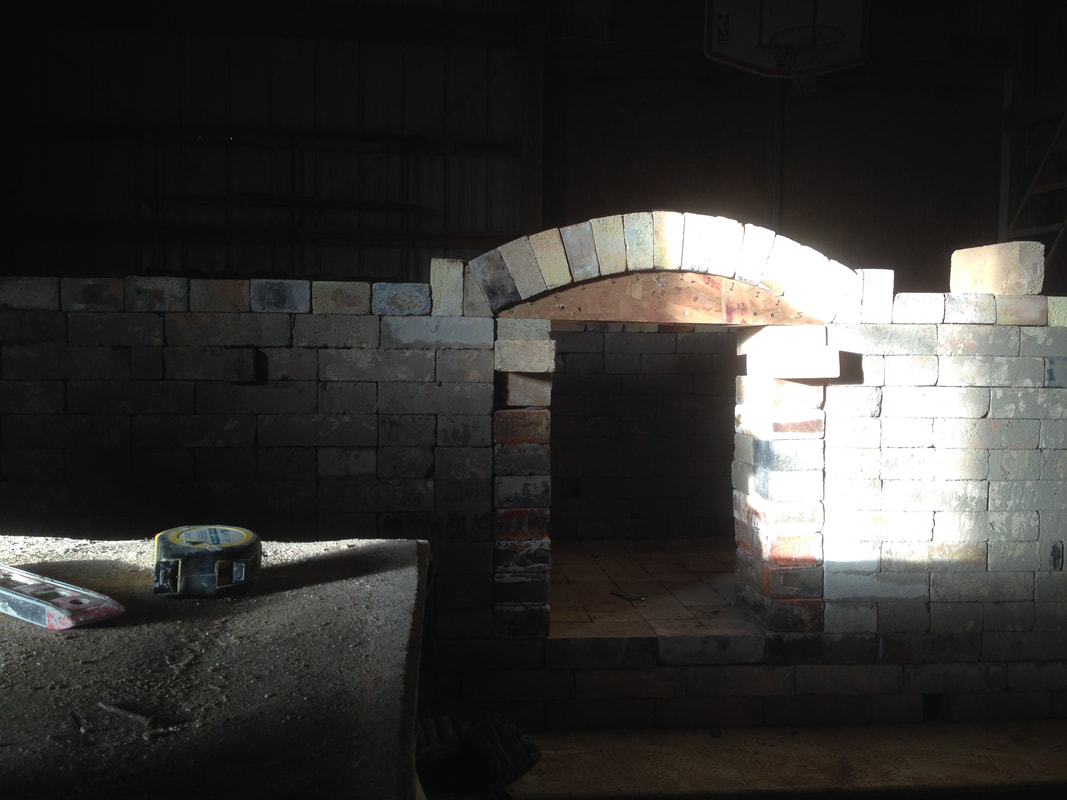
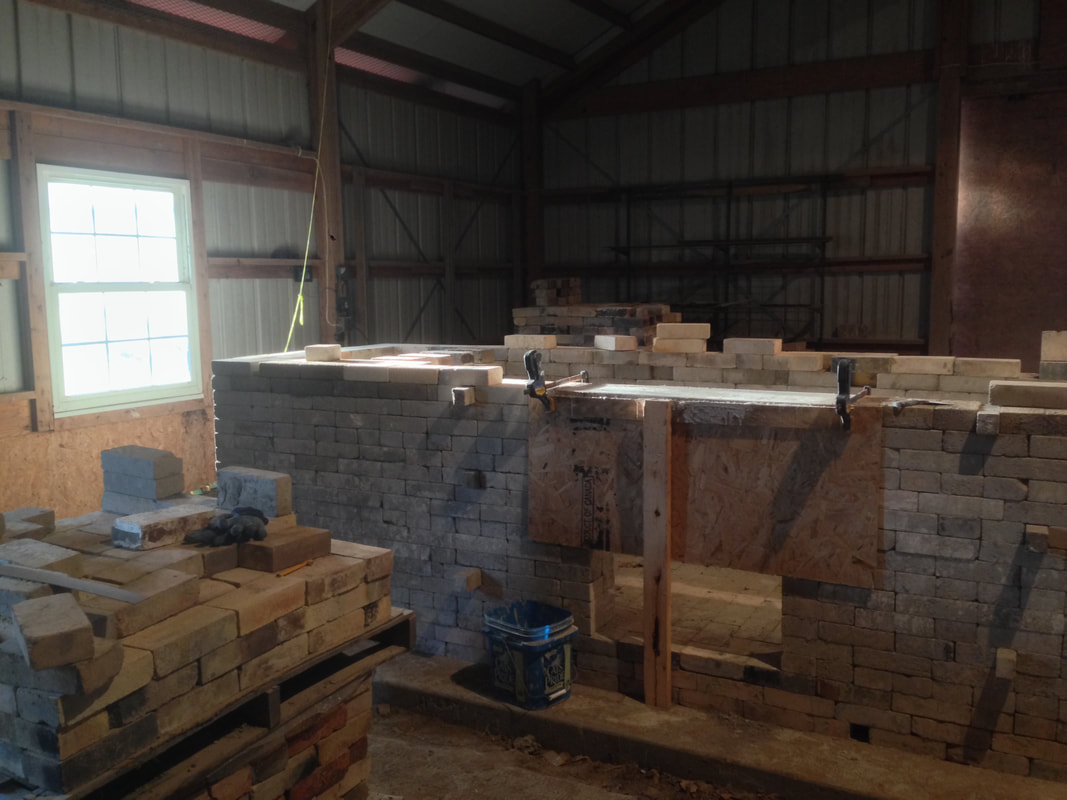
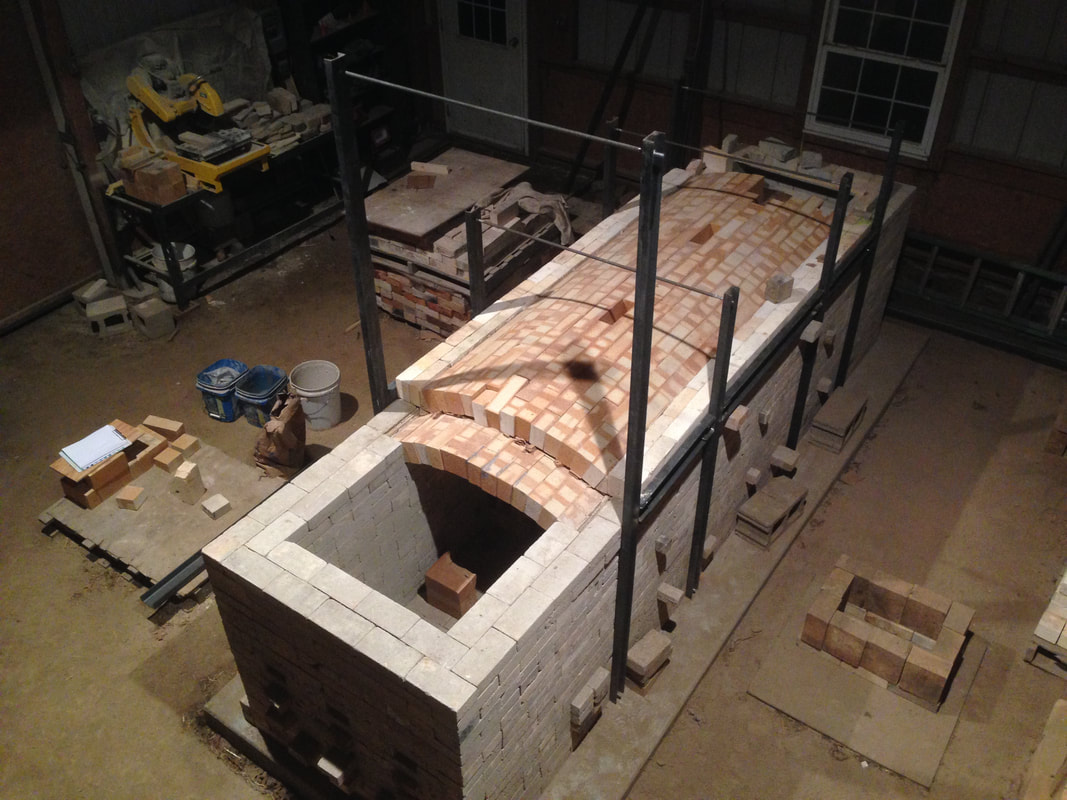
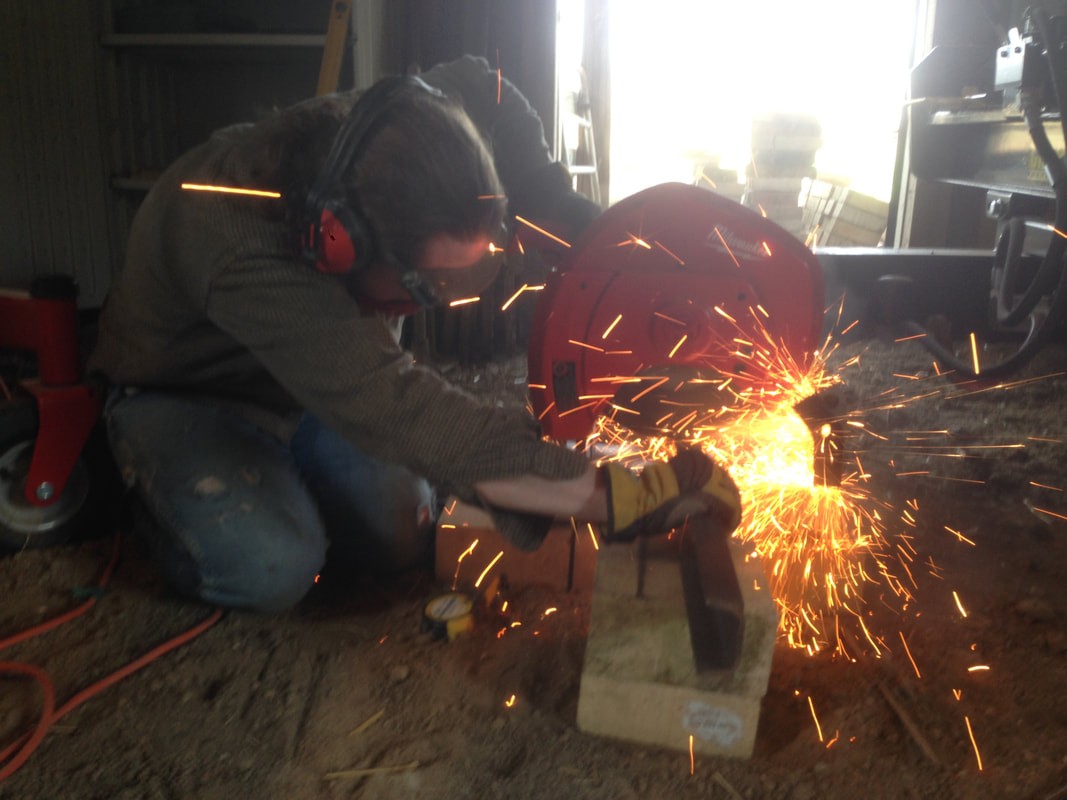
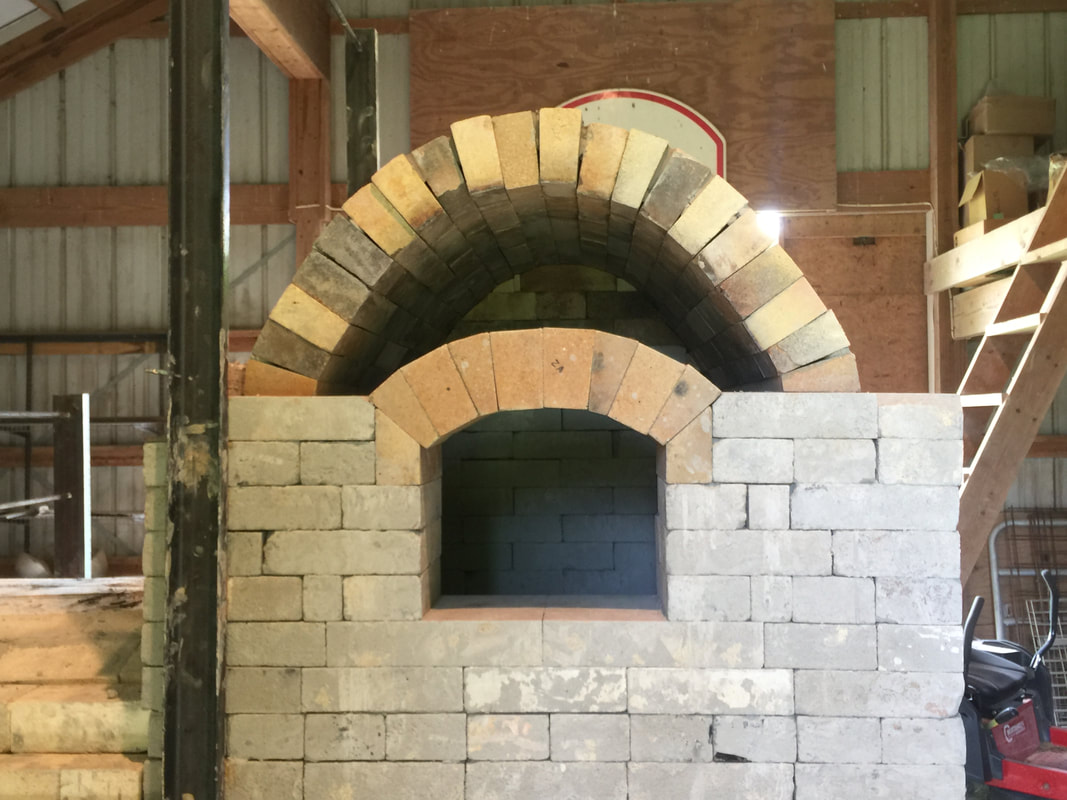
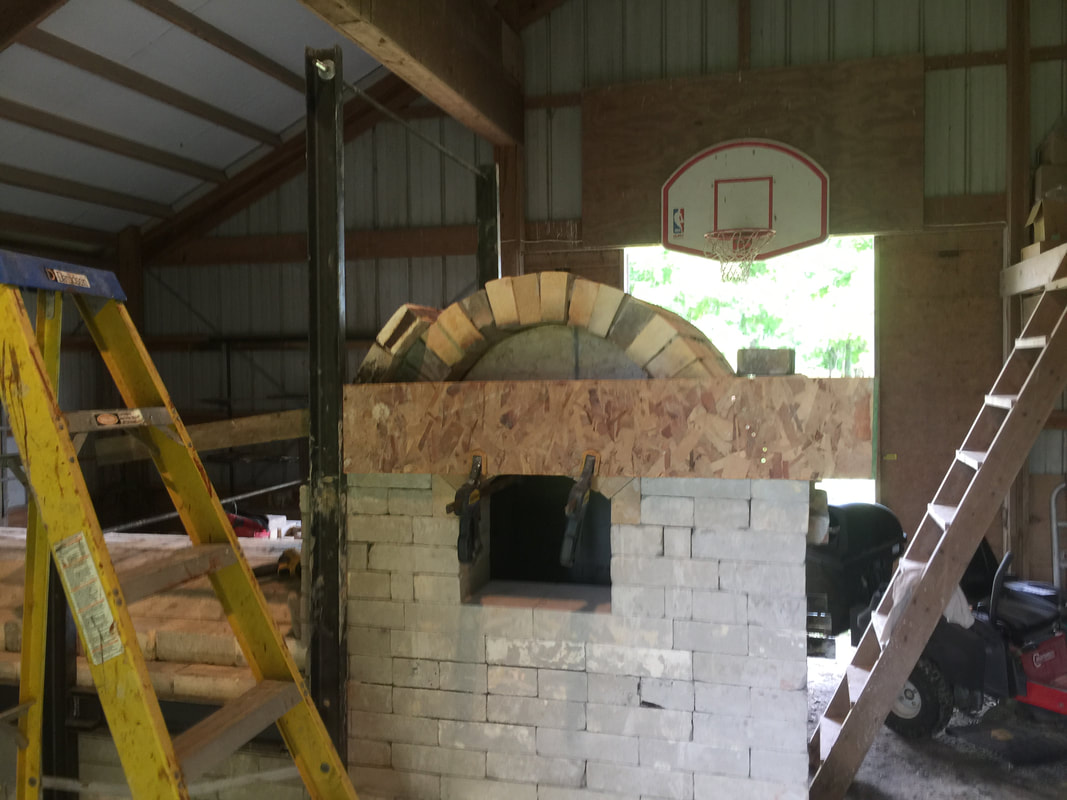
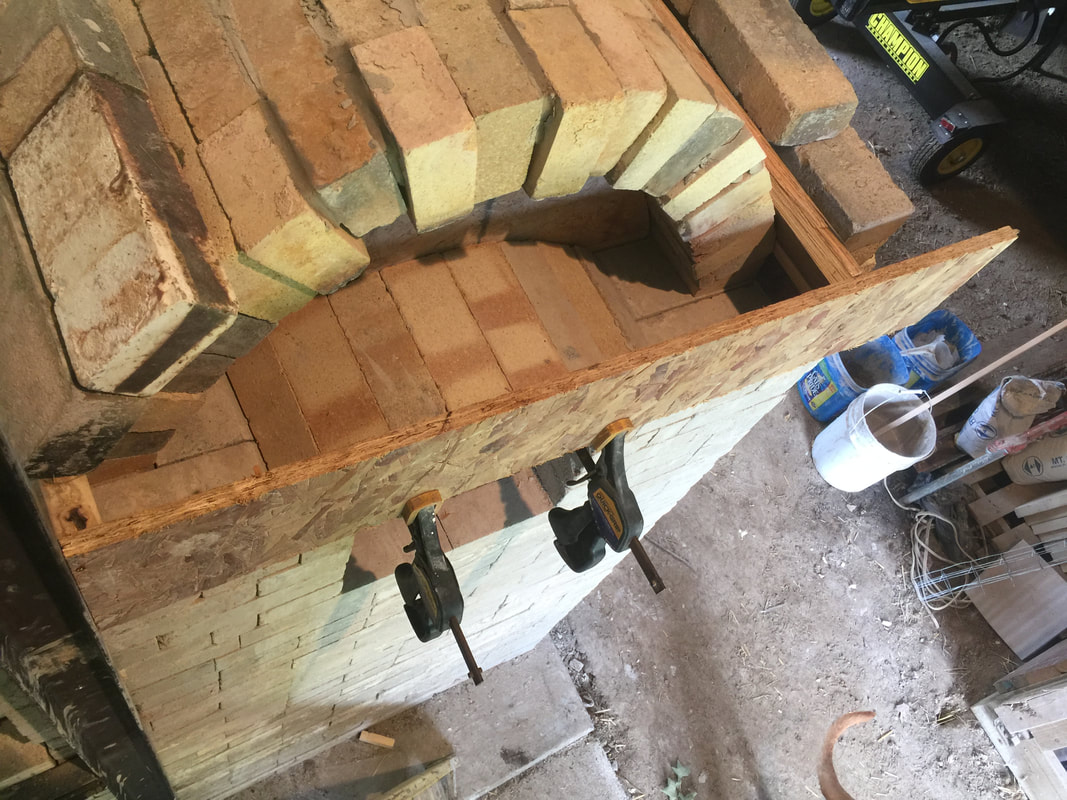
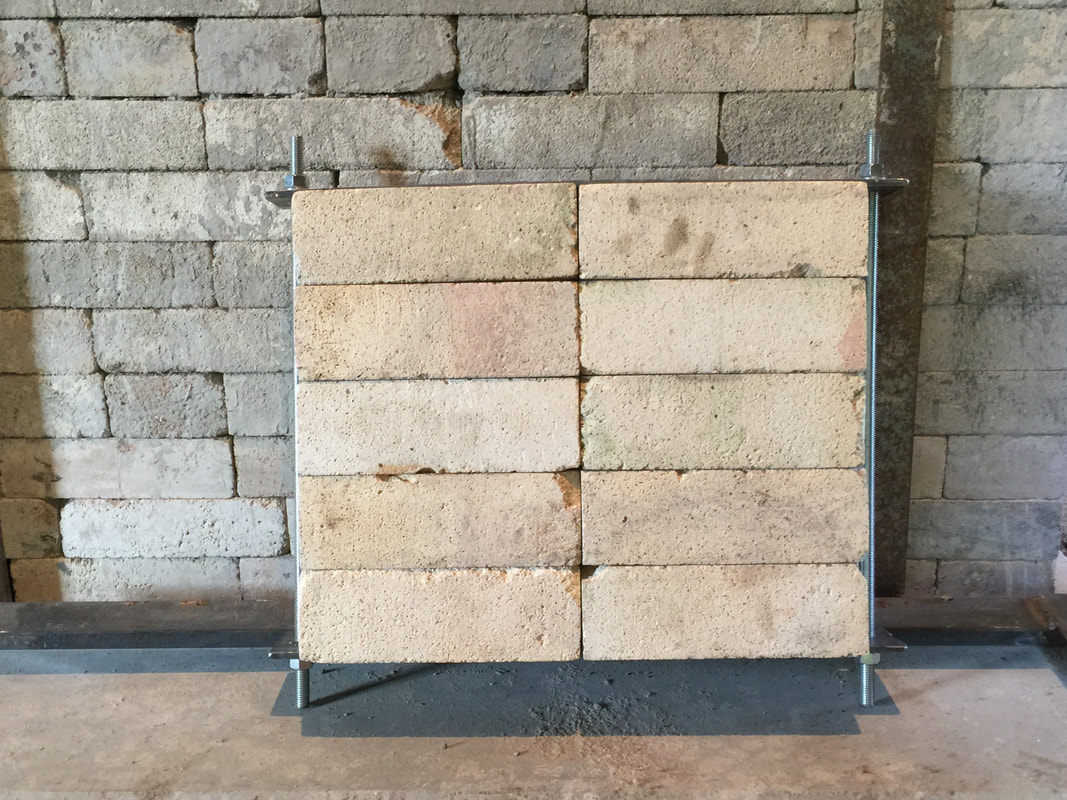
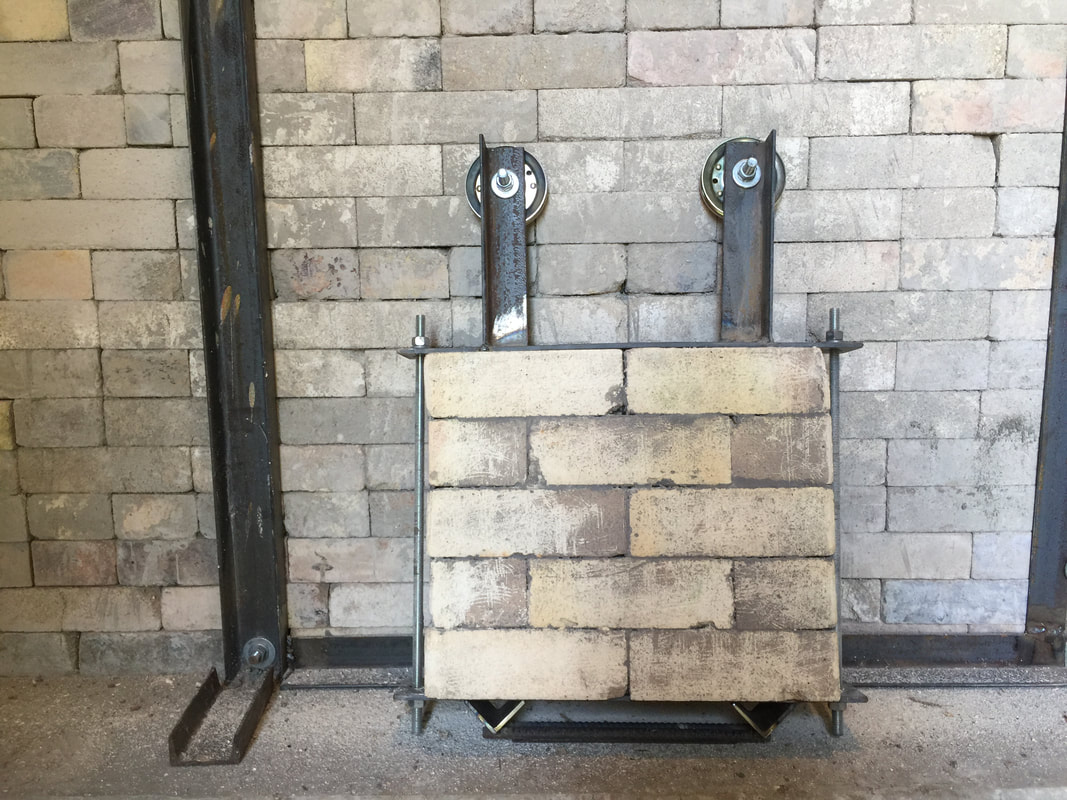
The next job was to insulate and finish the chamber and firebox arches. I want to start by giving a huge thank you to Stephen who came out and lent a hand with this process and made it go so much smoother than if I were just tackling it alone. Thank you, sir. First, we used a layer of 3" IFB (insulating firebrick), cut at angles to traverse the arch with minimal gappage. Next, a layer of insulating ceramic fiber gets cut and draped over both of the arches, effectively sealing any gaps that we were unable to prevent. Then we reached for the chicken wire. We tightly bound the chicken wire around the insulating fiber in order to give the finish layer a bit of purchase to prevent it from falling right off. To finish off, we mixed up a few bags of regular old concrete and spread a thin coat over both of the arches. We also stained the skim coat red with some iron oxide. I think we were subconsciously inspired by the red arches of our basketball hoop back there. Next stop, finish fabricating the frame and stoke door. 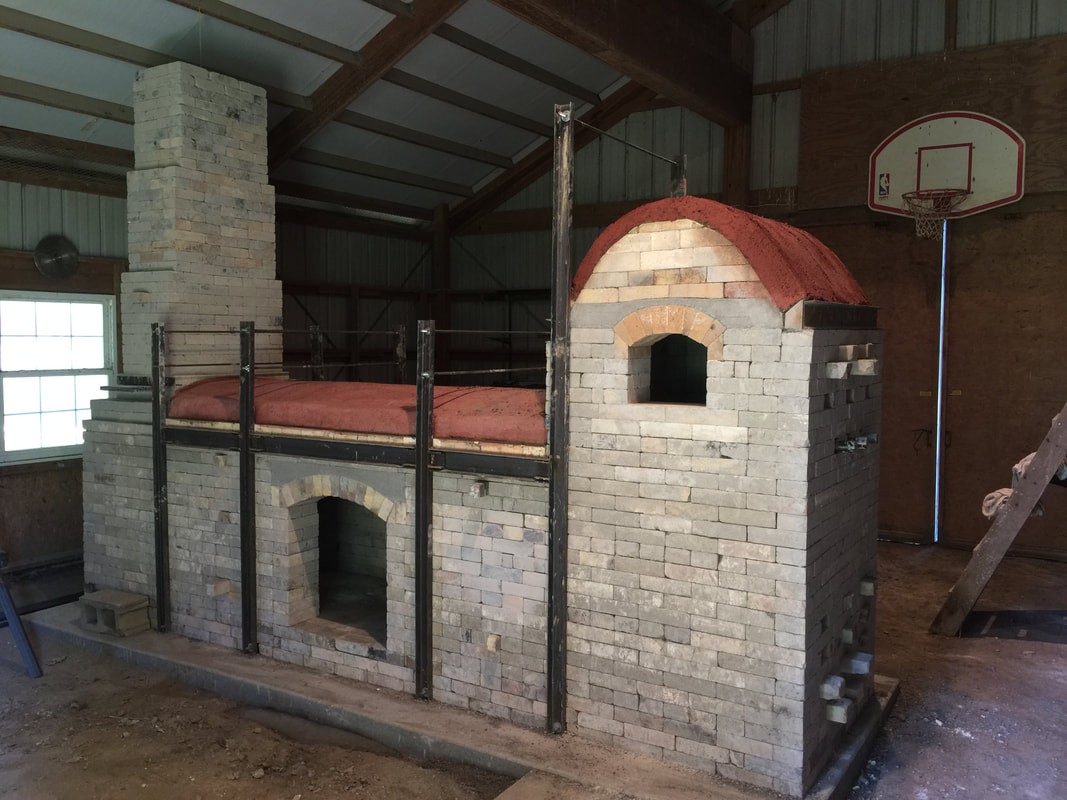 We decided that the best option for our door would be one that rolls on a track like the very doors of the barn. This type of door is easy to use, and relatively simple to make. I also like that it is fully integrated into the frame itself. No hanging from the ceiling, or precarious lean-to's. With Simon's help, we decided on a height for the track, which was just a piece of 1" angle iron, and tacked it up into place. We stuck the casters up on the rail and suddenly the kiln looked about as excited as we did. 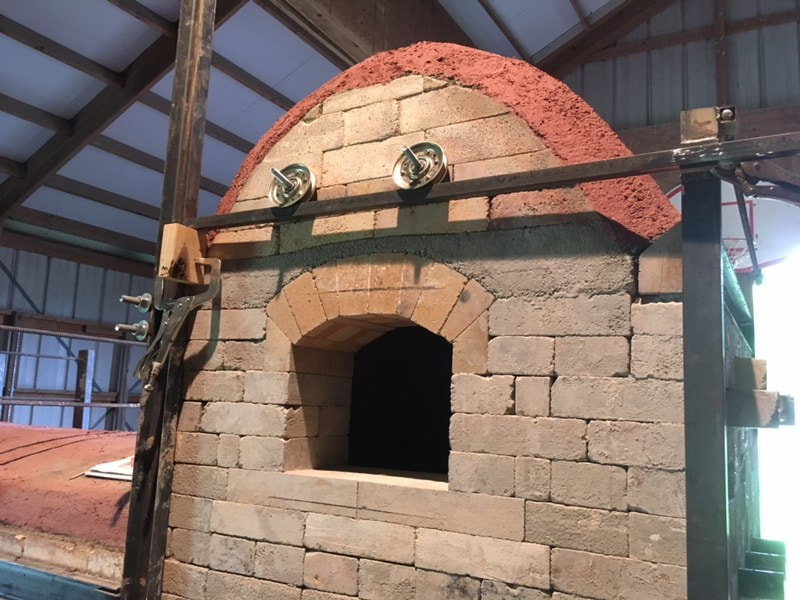 The door itself is just a stack of 3" IFB, mortared together *with the seams crossing*. As you can see below, my first version was not crossing seams. I removed two bricks, cut them in half, rearranged a bit, and viola! Stronger door. Luckily I hadn't mortared them together yet, so that process was quick and painless. The brick are cinched in between two flat pieces of steel with threaded bar on either side for tightening. Once I got the arms attached it was just a matter of minor adjustments to get the door to hang flush with the wall.
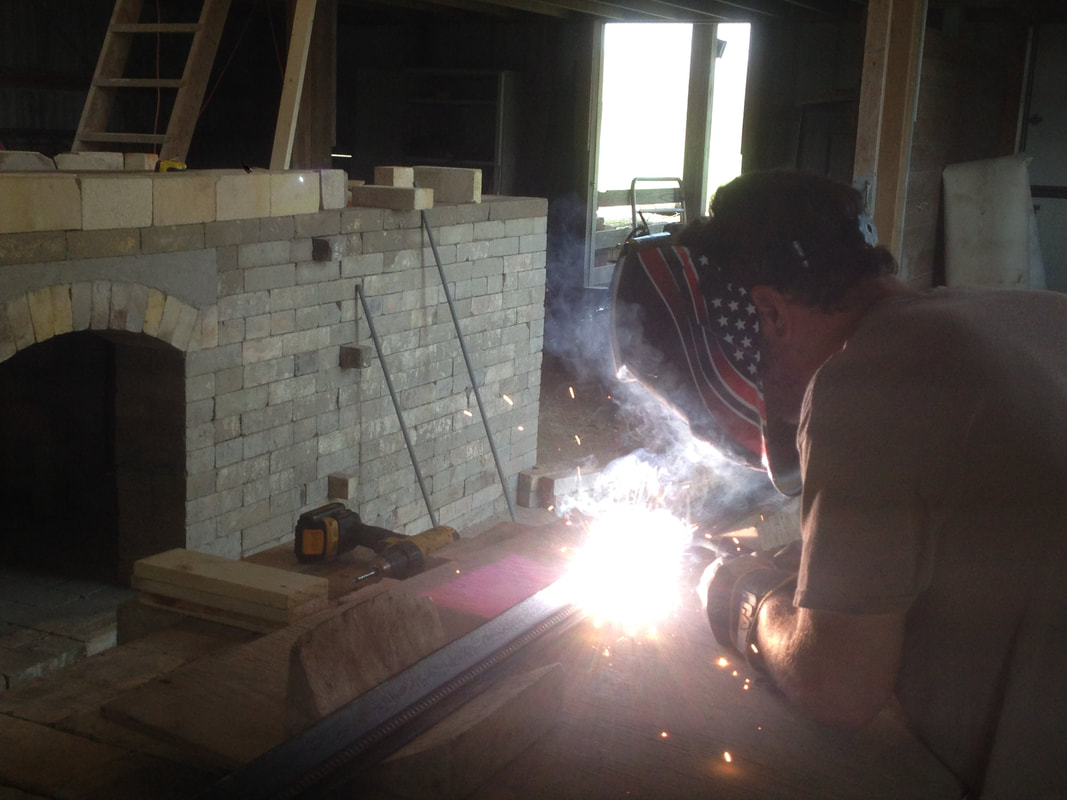
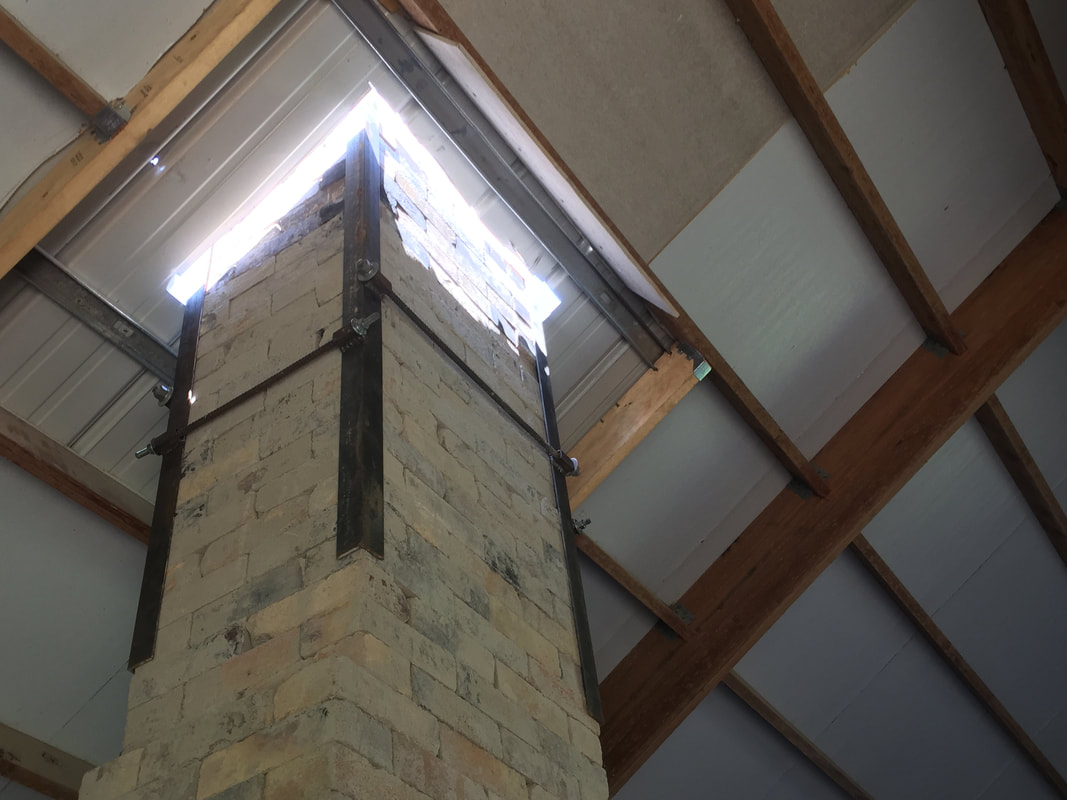
With the door dialed in, there was only one thing left to do: Cut open the roof of the barn and shoot that chimney up through it. Wu Meng-Che had arrived from Taiwan just in time to help us with the final steps! Brick by brick Meng climbed that ladder to hand off bricks for me to place atop the stack. After the final course went up, we stepped back to drink it in.
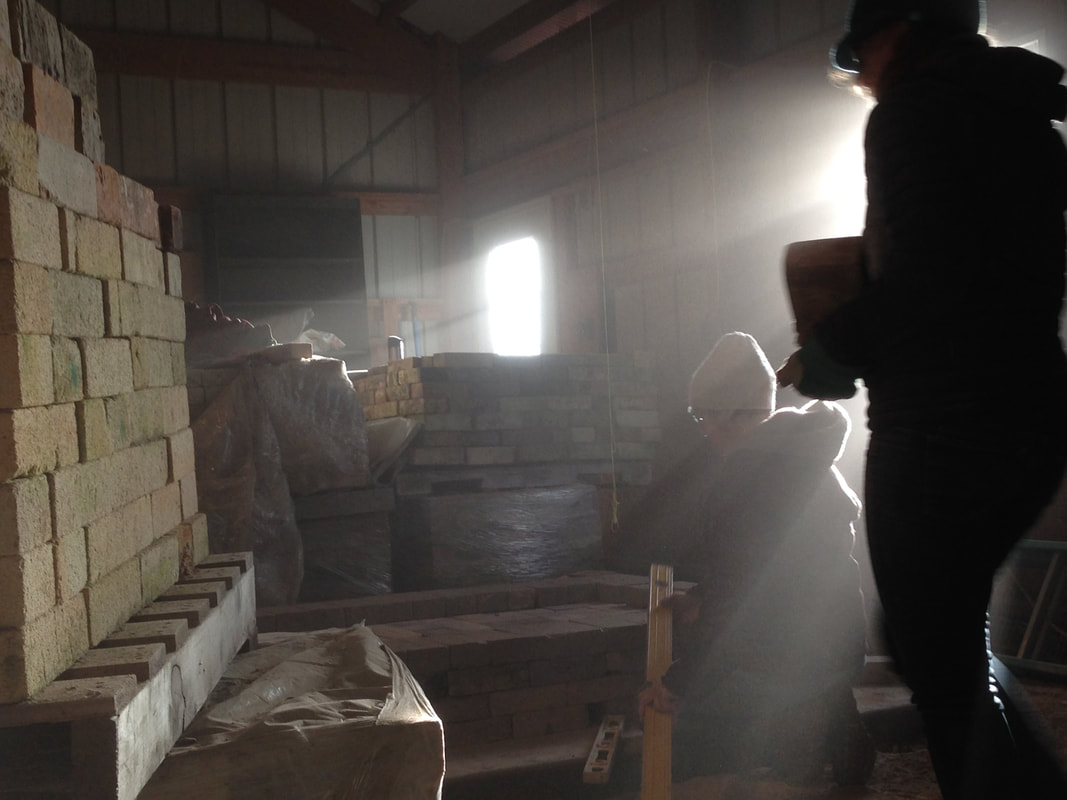
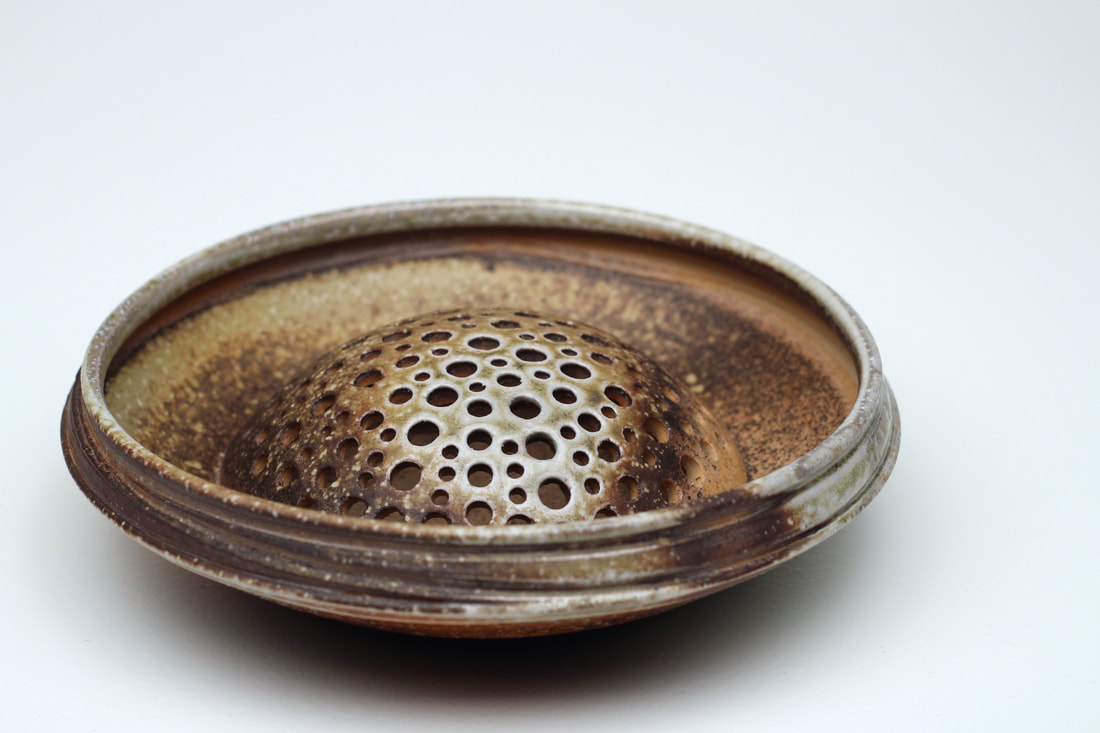 For 9 long months I had been dreaming of the day that I'd see a chimney peeking out of the barn's roof while driving up North Pawnee Road to the pottery. Coming back the next day, I saw it for the first time and got all warm and fuzzy inside.  We completed the kiln just two days before our first scheduled loading day. The night before loading began, Simon was jolted awake by a large crack of thunder and bright flashes of lightening. He scrambled up to look out and make sure that the new lightening rod that we had just stuck out of the barn roof hadn't been hit. The kiln was safe. The next day he told us about it and decided that the kiln's name should be the Lightening Train. Simon asked Meng how to say lightening and thunder in Mandarin. Turns out thunder is, "da lay". Unable to resist the play on words, the Da Lay Gama (Thunder Kiln) was born. One of the main reasons that I wanted to come and work with Simon was for the opportunity to build a wood-fired kiln under his guidance. Through this process I learned the foundations of brick laying, and principles around the planning and execution building a wood kiln. I learned my way around a brick saw, and how to MIG and flux-core wire weld. I learned about framing-in chimneys, and building roof crickets. I cultivated the standards to complete individual jobs well, and with intention. I even learned how to design a kiln using 3-D modeling software. I familiarized myself with the many different skill sets, both physical and philosophical, that are necessary for a project like this, and I am grateful. We've now fired the Da Lay Gama a total of 3 times. Each firing has taught me so much and it has been so cool to take that knowledge and quickly apply it to the proceeding firings. From a more macro perspective, getting to take clay pots that I made inside a studio that I built, and fire them inside a kiln that I constructed, with wood that I split and stacked, is an incredible feeling. The best word that I've come up with to describe it is wholesome. Everything feels like it belongs. It feeds my hunger and reinforces my plan to establish my own pottery some day, maybe not too far in the future. Once again I want to thank, Simon, Ian, Lars, Amy, Katy, Pip, Dan, Meng-Che, Greg, and Stephen for the efforts you all made in the process. Awesome work, gang. Thank you for reading. Here are some pics from firings 1-3! 
3 Comments
|


 RSS Feed