Chop Water, Carry Wood
Selected reflections on a life unfolding.
In pursuit of our goals we humbly chop our wood, and carry our water. But sometimes it's a little more fun to chop that water.
|
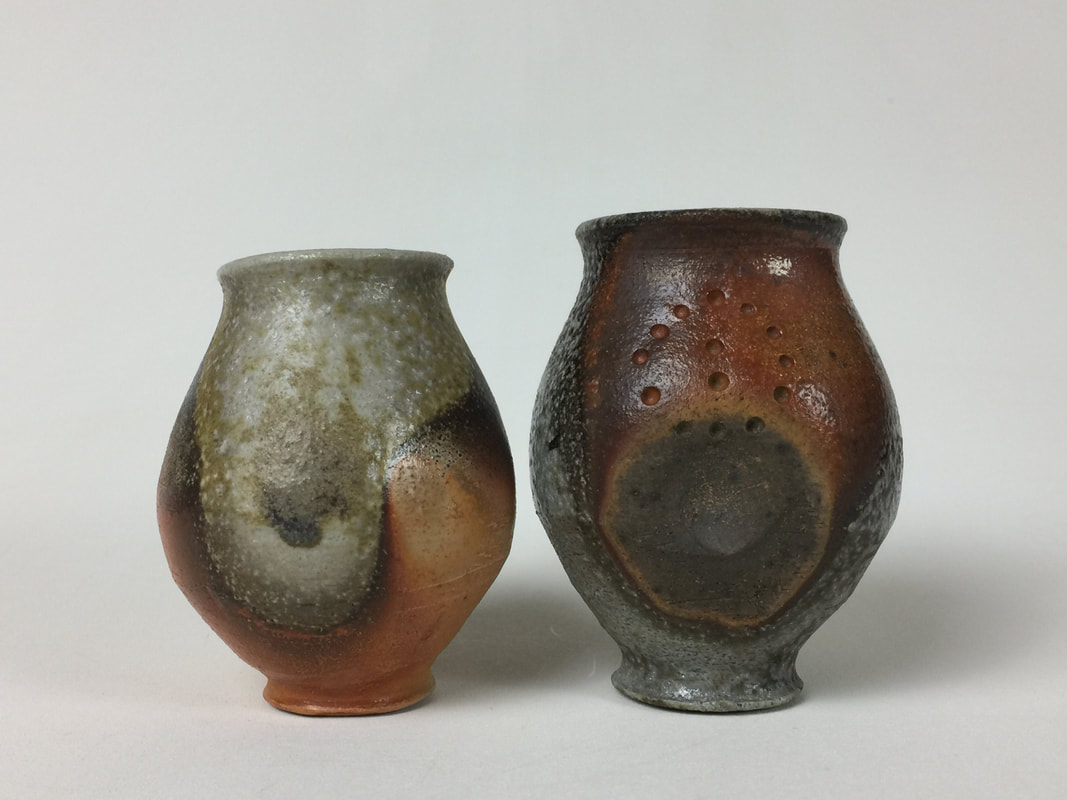
After three lovely months here in Red Lodge, Montana, I have officially reached the halfway mark of my 6-month, short-term residency. Red Lodge has proven to be a lovely little town, full of stoked folk who are grateful for, and take advantage of, the mountainous terrain and all of the adventurous opportunities it presents. It is inspiring! I have been frequenting the local ski resort, spending four days a week on the hill working as a Snowboard Instructor, and getting a fair amount of free riding in as well. It has all been a balancing act; figuring out how to *healthily* stay diligent in the studio, work two jobs, eat well, get enough rest, and throw some play in there, too. Such is life, I suppose? I'll be writing on this topic more in depth in the future... The real reason I am posting today is that I would like to share a more in depth look at the work that I've been doing in the studio since my arrival. So far I have formulated a fleet of clay body, slip, and glaze tests, fired the studio's cross-draft, gas/soda kiln twice, and began making work for firing #3. My original proposal idea was to formulate and test new clay bodies with high potential for exciting flashing and colors in atmospheric firings, based on testing I began during my apprenticeship. Could I achieve a color palette, and depth of surface in various types of firings other than long-form woodfiring? Below are my favorite clay body test results from the apprenticeship, which became the springboard for my experiments here in Red Lodge.  My two favorite tests from the Thunder Train. My two favorite tests from the Thunder Train. Upon my arrival, I mixed up 100lbs of each of these two recipes to begin making my first pots. I also mixed up several different iterations on these recipes in tiny test batches to see if I could zero in on an even more interesting palette. Soon I had a ware cart full of pots, and I was ready to fire. Prior to my first firing here, I had participated in a few soda firings over the years, but had never engaged myself in the nuances of the process. It was always just throwing a few spare pieces into someone else's kiln if they asked me to. They would take the lead on the firing, making all of the important decisions, i.e. how long/heavy is the body reduction, when and how do we introduce the soda, how much soda, how much soaking, cooling schedule, etc... For me, it was completely hands-off. Leading up to my first attempt I read several articles on soda firing, consulted a variety of books, namely Ruthanne Tudball's, Soda Glazing, and reached out to the soda community through the internet. Unsurprisingly, I found that there were many different approaches to this process, and also that there were some key threads that seemed to permeate the field. The more I read, and the more conversations I had, the clearer my goals and strategies became. I input this amalgam of information, took extensive notes, and just had to distill it all down to some semblance of a plan. The working plan became this:
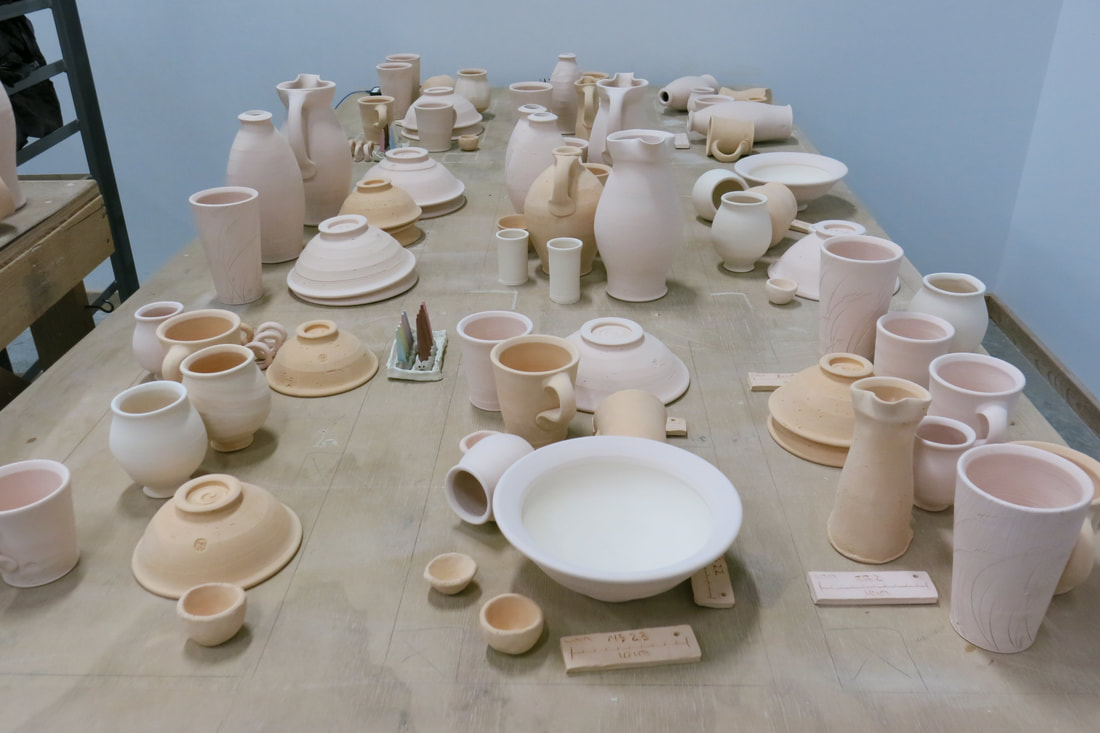
 Pots for firing #1 organized shelf by shelf before loading. Pots for firing #1 organized shelf by shelf before loading. Loading the 16 cubic foot kiln was a pretty smooth process. I decided to try staging all of my shelves before beginning to load so that I'd have a clear picture of what the inside of my kiln would look like; a process inspired by Deborah Smith of the Golden Bridge Pottery in Pondicherry. I photographed each "shelf" individually before and after the firing. This technique takes a bit of extra time, but gives some really beautiful details about what was going on inside the kiln. Naively, I thought that since I felt comfortable firing large anagamas, a small gas kiln should be a non-issue. By the end of firing #1, I found my foot lodged securely in my mouth. Firing #1 lasted 22 hours from my first turn-up early in the morning, to my final downfire stoke. I was absolutely spent, and demoralized because I decided to end the downfiring early (around 1900F) so that I could get 2 hours of sleep before my shift on the mountain the next morning. Multi-day woodfirings are certainly much longer, but when you are working with a good crew, you almost forget about the physical demands and get lost in the communal experience. Loading and firing this little soda kiln with just me, myself, and I, felt like a marathon. Firing #1 Details:
Results: In summary, the firing went well with many "successful" pieces coming from the kiln. There was a lot of dramatic and heavy soda build-up; surfaces that are what we would call, "juicy". I got some nice, heavy carbon trapping inside the soda, which did some really lovely spotting where large chunks of silica sand broke through the surface. That said, in terms of the clay colors, I did not get anything like what I was shooting for. Not being able to downfire to my desired temp seemed to leave the pots with a lack of depth and color, not to mention it made for a poor comparison to the original train kiln firing. On the bright side, I learned what happens if you only downfire to 1900F, something that I would not have even tried otherwise. The surfaces of my clay bodies were also a little on the shiny side for my taste. For the next firing I would adjust the clay body recipes to lower their silica:alumina ratio, and also use less soda.
I learned a ton from this initial firing, and it got me super stoked to load back up and fire again. I have enormous gratitude for all of the knowledgeable folks that I reached out to while researching soda-firing techniques. You know who you are; Thank you. And, thanks everyone else for reading! Another (shorter) post will be coming soon about firing #2. Cheers, Harry.
4 Comments
Big Valley Pottery
2/27/2020 09:34:54 am
Enjoyable, informative read. “Foot lodged in Red Lodge.” Keep on keepin’ on.
Reply
11/16/2020 07:49:11 am
Very impressive analytical approach! Methodical and creative, together an unusual and wonderful combination. Looking forward to seeing more of your work.
Reply
Tim
10/24/2023 10:50:34 am
Thank you very much for this detailed report! I am currently trying to get to grips with the subject and such informative and honest reports are invaluable!
Reply
Leave a Reply. |